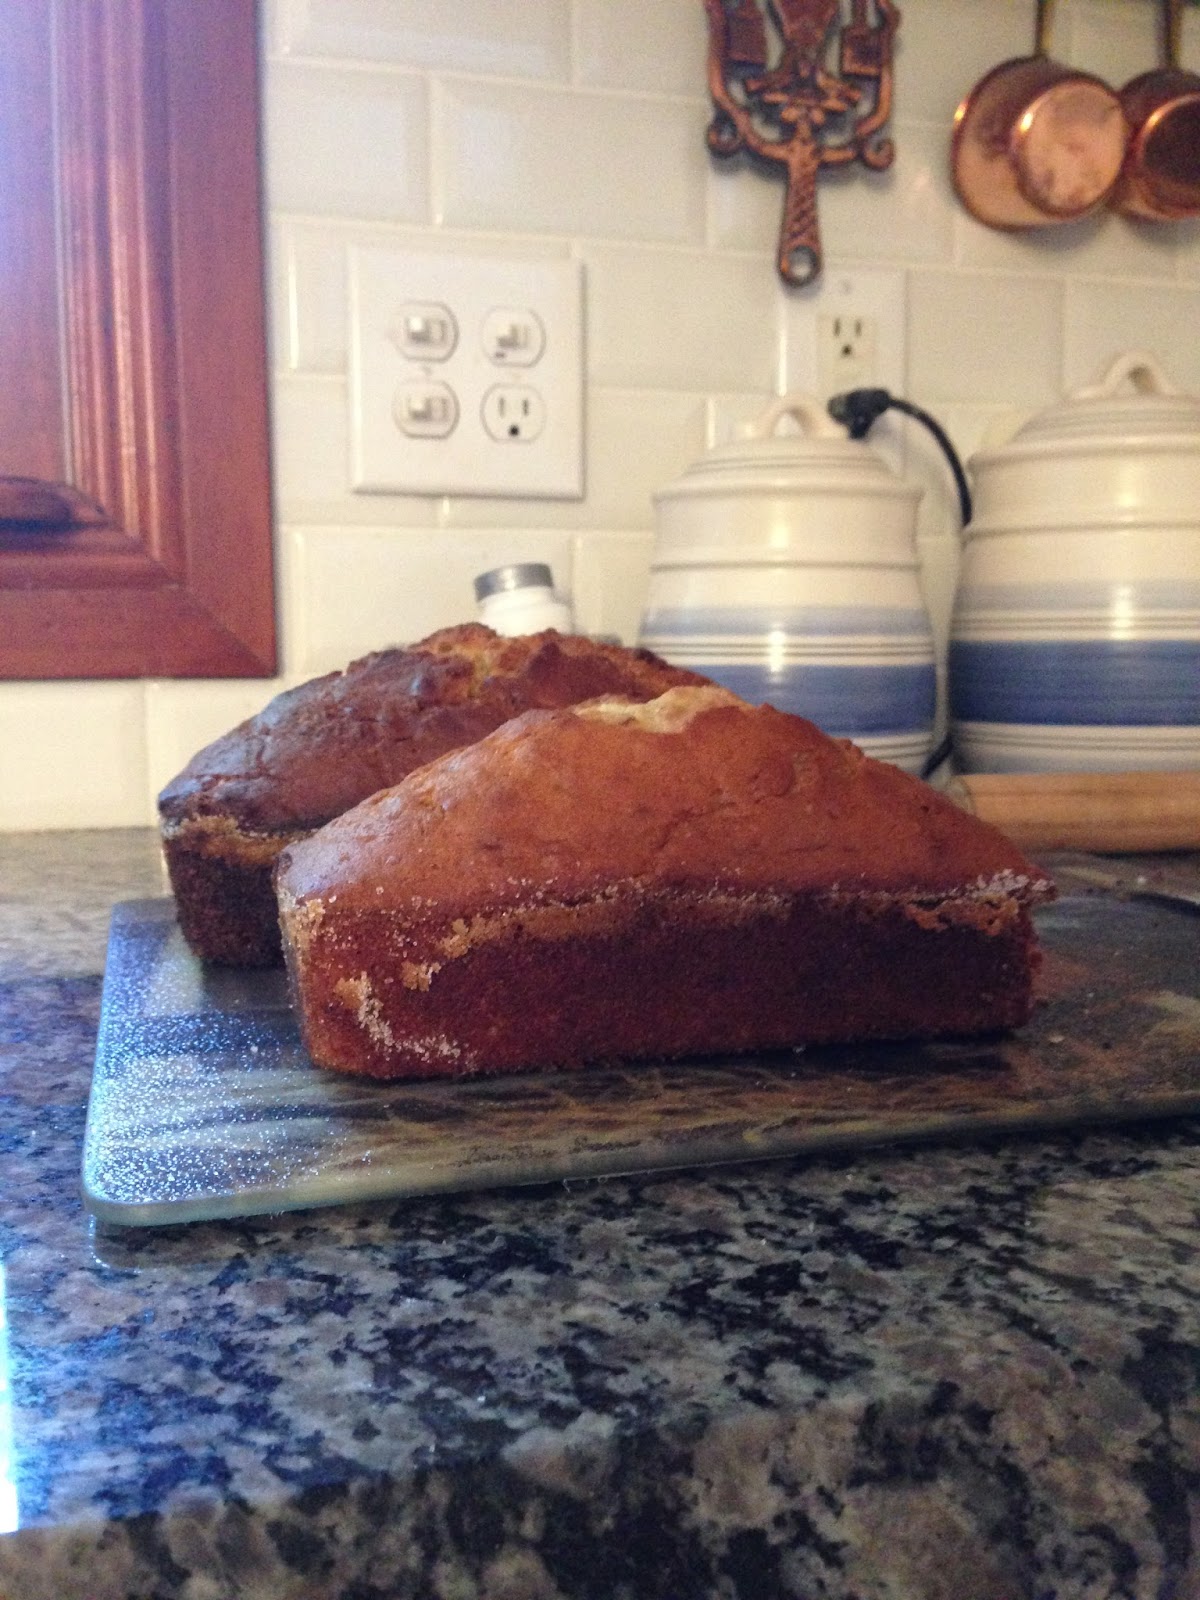
Basic Banana Bread
Why are there stretches of days when you’re really productive, then all of a sudden you don’t want to do a thing?
Like for example, I just arrived at my grandparents’ earlier this week; since arriving, I've gotten up in the mornings and ran, I baked this banana bread, I played my flute and piano, I sorted my college stuff...and the list goes on. That lasted all of 3 days before today came and I just felt like doing nothing. Maybe it's the sudden overcast weather? Yeah, let's blame it on that. After all, who wants to run in the rain?
Well, now it's 5:30 (pm!) and I've finally gotten myself motivated enough to write about banana bread instead of just eating it. <-- Not that that’s a bad thing, because it’s pretty tasty.
This is a really good basic banana bread. It’s fairly plain in terms of extra flavors added, which means it’s easy to dress up. Add a little cinnamon, some chocolate chips, some nuts…go for it, experiment!
However, this bread does already have one little secret. A very simple change that is subtle, but definitely makes a difference. A sugared pan. You know how you usually grease and flour a pan to prevent sticking? Well, same idea, except use sugar instead of flour. This gives the edges a delicate sweetness that makes them oh-so-good. No more avoiding the edges! However, you must use butter or Crisco when greasing the pan and not cooking spray. If you want to spray the pans, fine. But just don’t use sugar. It won’t work.
Now to try to salvage the rest of my day!
Basic Banana Bread
Notes:
I made 1 1/2 recipes of this bread, hence the extra, smaller loaf in the picture. If you make the recipe as above, you should only get one loaf.
You can also make this bread into 18-24 muffins, two 8x4" loaves, or three mini loaves; baking times will be affected.
Recipe from: http://www.crazyforcrust.com/2014/02/moms-banana-bread/
Saturday, August 8, 2015
Thursday, July 30, 2015
Tortilla Soup
This soup is super easy. Like throw-it-together-in-5-minutes easy. And yet, I still managed to have an accident while making it the other day.
I'm not even really sure how it happened. One minute I was happily cutting up frozen chicken, the next, I was watching the measuring cup of chicken fall off the counter, almost in slow motion. My hand must have bumped it, and there was nothing I could do to stop it. It was on the floor. And then, as if to rub it in, my friend's cat came while I stood there staring at it, and my friend snapped a picture. Whoops. Into the trash that half cup of chicken went.
My family introduced our friends to tortilla soup last time we stayed at their house (several months ago), and they loved it so much that this time I'm here, we just had to make it again. It was a gooooood idea. My stomach thanks me. Unfortunately, that also meant I had witnesses to the chicken episode, but what's life without chicken flying everywhere?
I would consider tortilla soup Tex Mex since it has both American and Mexican influences—but call it what you want. What really matters is that it's easy, it's warm, it's soupy, it's cheesy, you can scoop it up on tortilla chips and eat it (that's the best way, the only way), you can add sour cream or hot sauce to your bowl (not to mine, though). Tortilla soup is a definite favorite in my family; it's much requested, all year round.
Slow Cooker or Stove Top Tortilla Soup
Feeds 5-6
15 oz. can black beans, rinsed and drained
1 1/2 cups frozen corn
3/4 cup chunky salsa
14 oz. can chicken broth
1/4 cup water
3/4 cup boneless skinless cooked chicken, cubed
16 oz. can refried beans
2 cups shredded cheese (such as cheddar or colby jack)
1 bag tortilla chips
1. In a large saucepan or a crock pot, combine all ingredients except cheese and chips.
2. Heat on stove until heated through, or in a slow cooker for 3-4 hours.
3. Add half of cheese. Stir until melted.
4. Serve soup in bowls, and top with shredded cheese, tortilla chips, sour cream, and hot sauce.
Instant Pot Tortilla Soup
15 oz. can black beans, rinsed and drained
1 1/2 cups frozen corn
3/4 cup chunky salsa
14 oz. can chicken broth
1/4 cup water
3/4 cup boneless skinless cooked chicken, cubed
16 oz. can refried beans
2 cups shredded cheese (such as cheddar or colby jack)
1 bag tortilla chips
1. Pour black beans, corn, salsa, chicken broth, water, and chicken into the Instant Pot. Give it a quick stir.
2. Put lid on Instant Pot and manual cook for 10 minutes. Make sure the valve is set to “sealing.” When the timer beeps, release the pressure release for 10 minutes and then move the valve to “venting.”
3. Remove the lid and take out the chicken. Shred it on a cutting board then add it back into the Instant Pot.
4. Pour in the can of refried beans and 1 cup of the cheese, stirring until the soup is creamy and smooth. If necessary, use sauté mode to help melt the cheese.
5. Ladle the soup into bowls, and top with shredded cheese, tortilla chips, sour cream, and hot sauce.
I'm not even really sure how it happened. One minute I was happily cutting up frozen chicken, the next, I was watching the measuring cup of chicken fall off the counter, almost in slow motion. My hand must have bumped it, and there was nothing I could do to stop it. It was on the floor. And then, as if to rub it in, my friend's cat came while I stood there staring at it, and my friend snapped a picture. Whoops. Into the trash that half cup of chicken went.
My family introduced our friends to tortilla soup last time we stayed at their house (several months ago), and they loved it so much that this time I'm here, we just had to make it again. It was a gooooood idea. My stomach thanks me. Unfortunately, that also meant I had witnesses to the chicken episode, but what's life without chicken flying everywhere?
When we were making this soup, Hannah and I were on a roll. So, after throwing together the ingredients for tortilla soup, we also whipped up some cornbread and mashed some avocados for guacamole. Oh, and made a cheesecake. Just sayin'. Then after smelling the soup cook for a few hours, of course I ate waaaay too much of it at dinner; I just couldn't resist.
I would consider tortilla soup Tex Mex since it has both American and Mexican influences—but call it what you want. What really matters is that it's easy, it's warm, it's soupy, it's cheesy, you can scoop it up on tortilla chips and eat it (that's the best way, the only way), you can add sour cream or hot sauce to your bowl (not to mine, though). Tortilla soup is a definite favorite in my family; it's much requested, all year round.
Slow Cooker or Stove Top Tortilla Soup
Feeds 5-6
15 oz. can black beans, rinsed and drained
1 1/2 cups frozen corn
3/4 cup chunky salsa
14 oz. can chicken broth
1/4 cup water
3/4 cup boneless skinless cooked chicken, cubed
16 oz. can refried beans
2 cups shredded cheese (such as cheddar or colby jack)
1 bag tortilla chips
1. In a large saucepan or a crock pot, combine all ingredients except cheese and chips.
2. Heat on stove until heated through, or in a slow cooker for 3-4 hours.
3. Add half of cheese. Stir until melted.
4. Serve soup in bowls, and top with shredded cheese, tortilla chips, sour cream, and hot sauce.
Instant Pot Tortilla Soup
15 oz. can black beans, rinsed and drained
1 1/2 cups frozen corn
3/4 cup chunky salsa
14 oz. can chicken broth
1/4 cup water
3/4 cup boneless skinless cooked chicken, cubed
16 oz. can refried beans
2 cups shredded cheese (such as cheddar or colby jack)
1 bag tortilla chips
1. Pour black beans, corn, salsa, chicken broth, water, and chicken into the Instant Pot. Give it a quick stir.
2. Put lid on Instant Pot and manual cook for 10 minutes. Make sure the valve is set to “sealing.” When the timer beeps, release the pressure release for 10 minutes and then move the valve to “venting.”
3. Remove the lid and take out the chicken. Shred it on a cutting board then add it back into the Instant Pot.
4. Pour in the can of refried beans and 1 cup of the cheese, stirring until the soup is creamy and smooth. If necessary, use sauté mode to help melt the cheese.
5. Ladle the soup into bowls, and top with shredded cheese, tortilla chips, sour cream, and hot sauce.
Monday, July 27, 2015
Chicago Food Trip
Last weekend we took a father-daughter trip to Chicago to do cooking classes. Not only was it unique, but it was tons of fun! Here's an overview of what we did.
Day 1: Bread Making
http://mykitchenclatter.com/classes/
We drove right from Grand Rapids to the first class, which was about 1 1/2 hours outside of Chicago. It was a private bread making class at a lady's house. She had a big, beautiful kitchen and obviously knew what she was doing. Since the breads that we made revolved around the flour that she milled herself, first thing she did was show us how to pour wheat berries into the top of her flour mill, and to make a multipurpose bread out of the flour that was produced. It only took a few minutes to mill all the flour that we needed for the recipe.
After mixing up the simple dough, we split it into portions. The first portion we rolled into tight loaves of bread, which we let rise and later baked. When the bread came out of the oven, we spread butter, honey, and/or jam on it—yum! We were given a loaf of this to take home.
The second portion we made into a pizza; we put olive oil, goat cheese, fresh basil, tomatoes, and sausage on it. I had never had goat cheese before, but I was pleasantly surprised at how good it tasted on this pizza!
The last portion of dough she rolled flat, then brushed plenty of melted butter on top, and sprinkled with a thick layer of brown sugar and cinnamon. Warm out of the oven and slightly under-baked, they were some of the best cinnamon rolls I’ve eaten. She gave us some extras to take to the hotel for breakfast the next morning. We kept them in the fridge and ate them cold the next morning; normally, this isn’t the best way to eat cinnamon rolls, but these rolls were still amazing, even cold. We were all hunched over on the floor, gobbling down our cold, sugary cinnamon rolls.
At the end she ground some more flour up for Julia to take home and experiment with—I regret not also asking for some!
The lady gave us a lot of good information and useful tips for making homemade flour—what type of wheat berries to buy, what mixers to buy, how to use it…so much information that I can’t remember it all! However, now I know that making homemade flour is easy and tastes amazing. I was impressed that she made the pizza, cinnamon rolls, and bread all from the same dough, and all tasted fantastic.
A few things I learned from this class:

-dough made from homemade whole wheat flour is more difficult to mix (you need to use a stand mixer), but almost impossible to over-knead
-you must knead dough until it can stretch thin, but not have holes in it
-with homemade whole wheat flour, the dough rises faster, and only one rise is necessary
-use olive oil to make counters non-stick so that extra flour isn’t kneaded into the dough
-use more narrow pans for baking bread so that the bread is able to climb the sides, aiding rising
-wait at least 3 hours to cut fresh baked bread so that it won’t lose moisture and become dried out
-kitchen aids are much worse quality now because they changed brands; however, there are other options out there
-milling your own flour is almost the same cost as buying it (but the machine is expensive)
-wheat flour has a very short shelf life
-for good homemade wheat flour, you must buy reliable seed and let sit for a few days to see if there are bugs in it
Day 2: The Wooden Spoon
http://woodenspoonchicago.com/cooking-classes.html?month=6&year=2015
This class took place in a cooking store called The Wooden Spoon. We were in a group of 12 students; there was one chef to teach us, and one guy to do the dishes. We were preparing 5 dishes in all (smoked trout salad, grilled herb marinated hanger steak, pan roasted green beans with almonds, creamy risotto with asiago, and molten chocolate cake with peanut butter filling), so we split into groups of 2 or 3 and each group prepared the ingredients for one of the dishes. Julia, Elena, and I were the risotto crew.
After all of the ingredients were prepared, we started cooking the food. One person read the instructions, the other carried them out, and everyone else watched. The chef tried to get people to cook a dish that they did not prepare. However, somehow I ended up doing risotto again--but later I also got to help with the smoked trout salad a little.
After everything was finished cooking, we all sat down and ate together. The food was delicious! My favorite was the smoked trout on the salad and the molten chocolate cake (surprised?). We were given the recipes to take home, and I know I will be making that cake again!
Some things I learned from this class:
-how to hold a whisk: hold your elbow in, put your hand on top of the whisk, and make circular motions towards yourself
-blanch green beans with salt water in order to get the beans more perfectly cooked and to help them retain a bright green color
-grease cupcake pans for molten chocolate cakes with melted butter, then dust them with a mixture of flour and cocoa powder so that the cakes do not have white outsides when they are removed from the pans
-to sprinkle salt or pepper on something: pinch some in your fingers, then hold your hand high over the dish and rub your fingers together, moving your hand so that the salt/pepper is evenly distributed
Steve’s Segway Tour
http://www.stevessegwaytours.com/Pages/default.aspx
Later, after the cooking class at The Wooden Spoon, we went on a segway tour! It was a very last minute decision to join the tour, but the owner was accommodating to us.
Before the tour we got a lessen in how to ride the segways: basically, lean forward to go forward, lean backwards to stop or go backwards
. Except, it was a bit harder than this in reality—at first I struggled with smoothly transitioning from forwards to backwards, but by the end of the lessen I was doing pretty well.
Our tour guide was very friendly, and she was knowledgable about the city. She made the tour very enjoyable. We got lots of information about Chicago in general, its history, and specific buildings.
Overall, it was a very fun way to learn a lot about Chicago and see new things. Also, by the end of the tour I felt like a pro on the segway—even though Elena was the speed demon, not me. Luckily I was never a “segway star”, when you fall off your segway and catch yourself by throwing up your arms like a star. Overall, the tour was a little expensive, but totally worth it.
Day 3: Give Me Some Sugar
https://givesugar.com/parties/private-instruction-2
This was a private class located a little outside of Chicago. They do many other baking classes here as well.
We each had a small chocolate cake that they had made for us and had cut properly. The owner of the shop demonstrated with her own cake how to do the cutting that they had already done for us (you get to do it yourself in the cake decorating 2 class). Afterwards, she showed us how to crumb coat our cakes…which I found a lot harder than she made it look. The cakes were then put in the fridge to set while we practiced different frosting techniques.
She showed us how to use a star tip and a round tip, and the different things we could do with each of them. We practiced the techniques over and over again on parchment paper. I found writing to be the most difficult to make look good—it's much different from normal writing! I liked making little flowers with the star tips best—as you can see from the way I decorated my cake!
When we got our cakes back, she demonstrated how to frost the cakes, which we then tried ourselves (remember: the enemy of good is better. This applies 100% here!). After finally accepting that any more fiddling with the frosting would make my cake look worse not better, I decorated my cake. I chose a simple design, because I know from experience that if I try anything too fancy, it will not look good!
I brought my cake to my friend’s house and we devoured it within a few days. Yuuum.
Things I learned:

-use a serrated knife to cut cake
-a turntable is essential (at least, if you’re serious about cake decorating)
-a crumb coat is a thin layer of frosting that seals in the crumbs; you must let it set in the fridge for at least 30 minutes, but preferably overnight before frosting and decorating it
-we used Italian buttercream to frost our cakes; it is made out of whipped egg whites, sugar water, and butter—lots of butter! I do not like it as much as American buttercream because it is so buttery and has little flavor (unless you add flavoring, like mint extract, in which case it’s great!)
-to hold a pastry bag: twist and hold the top closed with your right hand and squeeze down on the frosting; hold your right wrist with your left hand to steady and direct your right hand
-when writing on a cake you can use a toothpick to trace your words into the frosting first
Day 4: Bobby’s Bike Hike food tour
http://www.bobbysbikehike.com/default.aspx
This day we had no cooking classes planned, so Elena and I planned a surprise for my dad. We knew we wanted to do something with bikes, since he loves biking. After doing some looking, we decided on a bike-food tour because 1) who doesn’t like food? and 2) we loved our food tour in Italy. Plus, it was a bonus that it kept with the food theme of our trip.
Bobby’s Bike Hike was near our hotel, and easy to find. We were fitted with helmets and bi
kes (which all had names, haha—mine was Julius). Our guide was super friendly and knew a lot about Chicago and the food.
The first place we biked to was Gino’s deep dish pizza. Apparently they are still using the same recipe as they originally used 100 years ago when they started. It was an interesting restaurant because every possible surface was covered in writing, sometimes layers of writing so thick that you couldn’t decipher anything (ironically there was a sign outside the restaurant asking people not to write on the walls). The pizza was really good; it had a nice crispy crust and lots of thick cheese.
Next we biked to Swirl’s cupcakes. Swirl’s was one of the first cupcake bakeries in Chicago, and it opened right at the start of the cupcake craze…so at 9 years old, they are ancient in the cupcake world. Everyday the cupcakes are made fresh, meaning someone has to wake up at 12:30 in the morning to make the delicious cupcakes. Each cupcake is decorated beautifully with a lot of thought to the flavors; the cake is moist and topped with a tall swirl of Italian buttercream (the same thing we used to decorate our cakes, except this was flavored so I liked it better). There are flavors of the day and also gluten-free/vegan cupcakes. I got a mint chocolate chip cupcake which was so scrumptious (why doesn’t anyone use that word anymore? It’s awesome); it had a chocolate filling and a chocolate mint cookie buried under a tall piled of chocolate-covered mint frosting.
After cupcakes we rode over to have some hot dogs at Murphy’s Red Hots. They ensconce grilled Vienna beef in soft steamed poppyseed buns. You can get your dog “Chicago style” with everything on it, but Elena and I opted to get a plain one. Upon telling the man at the counter this, he was surprised and asked “you aren’t going to order ketchup on it, are you?”. We assured him that we were not! Our guide had told us before entering the store that if you order ketchup on your dog, you may be sent to the back of the line to try ordering again. This is because ketchup was originally made to cover up the taste of bad meat; thus, if you order ketchup on your hot dog, it is insulting because it is saying that their hot dogs taste bad. So, Elena had to sneak some of the french fry ketchup on her hot dog after we found a table.
Lastly, we biked to a bar by Wrigley Field. I got root beer, which was really good. We went up to the roof of the bar where bleachers were located, facing out over Wrigley Field, which was cool.
We took the lakefront trail back to Bobby’s Bike Hike, stopping once on the way to jump in the sparkling blue lake.
This trip was fantastic, and I highly suggest doing something like this for anyone who likes to mess around with food! I would recommend any of the places that we went for classes, since they were all great; all of them have other options for classes too.
Day 1: Bread Making
http://mykitchenclatter.com/classes/
We drove right from Grand Rapids to the first class, which was about 1 1/2 hours outside of Chicago. It was a private bread making class at a lady's house. She had a big, beautiful kitchen and obviously knew what she was doing. Since the breads that we made revolved around the flour that she milled herself, first thing she did was show us how to pour wheat berries into the top of her flour mill, and to make a multipurpose bread out of the flour that was produced. It only took a few minutes to mill all the flour that we needed for the recipe.After mixing up the simple dough, we split it into portions. The first portion we rolled into tight loaves of bread, which we let rise and later baked. When the bread came out of the oven, we spread butter, honey, and/or jam on it—yum! We were given a loaf of this to take home.
The second portion we made into a pizza; we put olive oil, goat cheese, fresh basil, tomatoes, and sausage on it. I had never had goat cheese before, but I was pleasantly surprised at how good it tasted on this pizza!
The last portion of dough she rolled flat, then brushed plenty of melted butter on top, and sprinkled with a thick layer of brown sugar and cinnamon. Warm out of the oven and slightly under-baked, they were some of the best cinnamon rolls I’ve eaten. She gave us some extras to take to the hotel for breakfast the next morning. We kept them in the fridge and ate them cold the next morning; normally, this isn’t the best way to eat cinnamon rolls, but these rolls were still amazing, even cold. We were all hunched over on the floor, gobbling down our cold, sugary cinnamon rolls.At the end she ground some more flour up for Julia to take home and experiment with—I regret not also asking for some!
The lady gave us a lot of good information and useful tips for making homemade flour—what type of wheat berries to buy, what mixers to buy, how to use it…so much information that I can’t remember it all! However, now I know that making homemade flour is easy and tastes amazing. I was impressed that she made the pizza, cinnamon rolls, and bread all from the same dough, and all tasted fantastic.
A few things I learned from this class:

-dough made from homemade whole wheat flour is more difficult to mix (you need to use a stand mixer), but almost impossible to over-knead
-you must knead dough until it can stretch thin, but not have holes in it
-with homemade whole wheat flour, the dough rises faster, and only one rise is necessary
-use olive oil to make counters non-stick so that extra flour isn’t kneaded into the dough
-use more narrow pans for baking bread so that the bread is able to climb the sides, aiding rising
-wait at least 3 hours to cut fresh baked bread so that it won’t lose moisture and become dried out
-kitchen aids are much worse quality now because they changed brands; however, there are other options out there
-milling your own flour is almost the same cost as buying it (but the machine is expensive)
-wheat flour has a very short shelf life
-for good homemade wheat flour, you must buy reliable seed and let sit for a few days to see if there are bugs in it
Day 2: The Wooden Spoon
http://woodenspoonchicago.com/cooking-classes.html?month=6&year=2015
This class took place in a cooking store called The Wooden Spoon. We were in a group of 12 students; there was one chef to teach us, and one guy to do the dishes. We were preparing 5 dishes in all (smoked trout salad, grilled herb marinated hanger steak, pan roasted green beans with almonds, creamy risotto with asiago, and molten chocolate cake with peanut butter filling), so we split into groups of 2 or 3 and each group prepared the ingredients for one of the dishes. Julia, Elena, and I were the risotto crew.
After all of the ingredients were prepared, we started cooking the food. One person read the instructions, the other carried them out, and everyone else watched. The chef tried to get people to cook a dish that they did not prepare. However, somehow I ended up doing risotto again--but later I also got to help with the smoked trout salad a little.After everything was finished cooking, we all sat down and ate together. The food was delicious! My favorite was the smoked trout on the salad and the molten chocolate cake (surprised?). We were given the recipes to take home, and I know I will be making that cake again!
Some things I learned from this class:
-how to hold a whisk: hold your elbow in, put your hand on top of the whisk, and make circular motions towards yourself
-blanch green beans with salt water in order to get the beans more perfectly cooked and to help them retain a bright green color-grease cupcake pans for molten chocolate cakes with melted butter, then dust them with a mixture of flour and cocoa powder so that the cakes do not have white outsides when they are removed from the pans
-to sprinkle salt or pepper on something: pinch some in your fingers, then hold your hand high over the dish and rub your fingers together, moving your hand so that the salt/pepper is evenly distributed
Steve’s Segway Tour
http://www.stevessegwaytours.com/Pages/default.aspx
Later, after the cooking class at The Wooden Spoon, we went on a segway tour! It was a very last minute decision to join the tour, but the owner was accommodating to us.Before the tour we got a lessen in how to ride the segways: basically, lean forward to go forward, lean backwards to stop or go backwards
. Except, it was a bit harder than this in reality—at first I struggled with smoothly transitioning from forwards to backwards, but by the end of the lessen I was doing pretty well.
Our tour guide was very friendly, and she was knowledgable about the city. She made the tour very enjoyable. We got lots of information about Chicago in general, its history, and specific buildings.
Overall, it was a very fun way to learn a lot about Chicago and see new things. Also, by the end of the tour I felt like a pro on the segway—even though Elena was the speed demon, not me. Luckily I was never a “segway star”, when you fall off your segway and catch yourself by throwing up your arms like a star. Overall, the tour was a little expensive, but totally worth it.
Day 3: Give Me Some Sugar
https://givesugar.com/parties/private-instruction-2This was a private class located a little outside of Chicago. They do many other baking classes here as well.
We each had a small chocolate cake that they had made for us and had cut properly. The owner of the shop demonstrated with her own cake how to do the cutting that they had already done for us (you get to do it yourself in the cake decorating 2 class). Afterwards, she showed us how to crumb coat our cakes…which I found a lot harder than she made it look. The cakes were then put in the fridge to set while we practiced different frosting techniques.
She showed us how to use a star tip and a round tip, and the different things we could do with each of them. We practiced the techniques over and over again on parchment paper. I found writing to be the most difficult to make look good—it's much different from normal writing! I liked making little flowers with the star tips best—as you can see from the way I decorated my cake!When we got our cakes back, she demonstrated how to frost the cakes, which we then tried ourselves (remember: the enemy of good is better. This applies 100% here!). After finally accepting that any more fiddling with the frosting would make my cake look worse not better, I decorated my cake. I chose a simple design, because I know from experience that if I try anything too fancy, it will not look good!
I brought my cake to my friend’s house and we devoured it within a few days. Yuuum.
Things I learned:

-use a serrated knife to cut cake
-a turntable is essential (at least, if you’re serious about cake decorating)
-a crumb coat is a thin layer of frosting that seals in the crumbs; you must let it set in the fridge for at least 30 minutes, but preferably overnight before frosting and decorating it
-we used Italian buttercream to frost our cakes; it is made out of whipped egg whites, sugar water, and butter—lots of butter! I do not like it as much as American buttercream because it is so buttery and has little flavor (unless you add flavoring, like mint extract, in which case it’s great!)
-to hold a pastry bag: twist and hold the top closed with your right hand and squeeze down on the frosting; hold your right wrist with your left hand to steady and direct your right hand
-when writing on a cake you can use a toothpick to trace your words into the frosting first
Day 4: Bobby’s Bike Hike food tour
http://www.bobbysbikehike.com/default.aspx
Bobby’s Bike Hike was near our hotel, and easy to find. We were fitted with helmets and bi
kes (which all had names, haha—mine was Julius). Our guide was super friendly and knew a lot about Chicago and the food.
The first place we biked to was Gino’s deep dish pizza. Apparently they are still using the same recipe as they originally used 100 years ago when they started. It was an interesting restaurant because every possible surface was covered in writing, sometimes layers of writing so thick that you couldn’t decipher anything (ironically there was a sign outside the restaurant asking people not to write on the walls). The pizza was really good; it had a nice crispy crust and lots of thick cheese.
Next we biked to Swirl’s cupcakes. Swirl’s was one of the first cupcake bakeries in Chicago, and it opened right at the start of the cupcake craze…so at 9 years old, they are ancient in the cupcake world. Everyday the cupcakes are made fresh, meaning someone has to wake up at 12:30 in the morning to make the delicious cupcakes. Each cupcake is decorated beautifully with a lot of thought to the flavors; the cake is moist and topped with a tall swirl of Italian buttercream (the same thing we used to decorate our cakes, except this was flavored so I liked it better). There are flavors of the day and also gluten-free/vegan cupcakes. I got a mint chocolate chip cupcake which was so scrumptious (why doesn’t anyone use that word anymore? It’s awesome); it had a chocolate filling and a chocolate mint cookie buried under a tall piled of chocolate-covered mint frosting.
After cupcakes we rode over to have some hot dogs at Murphy’s Red Hots. They ensconce grilled Vienna beef in soft steamed poppyseed buns. You can get your dog “Chicago style” with everything on it, but Elena and I opted to get a plain one. Upon telling the man at the counter this, he was surprised and asked “you aren’t going to order ketchup on it, are you?”. We assured him that we were not! Our guide had told us before entering the store that if you order ketchup on your dog, you may be sent to the back of the line to try ordering again. This is because ketchup was originally made to cover up the taste of bad meat; thus, if you order ketchup on your hot dog, it is insulting because it is saying that their hot dogs taste bad. So, Elena had to sneak some of the french fry ketchup on her hot dog after we found a table.
Lastly, we biked to a bar by Wrigley Field. I got root beer, which was really good. We went up to the roof of the bar where bleachers were located, facing out over Wrigley Field, which was cool.
We took the lakefront trail back to Bobby’s Bike Hike, stopping once on the way to jump in the sparkling blue lake.
This trip was fantastic, and I highly suggest doing something like this for anyone who likes to mess around with food! I would recommend any of the places that we went for classes, since they were all great; all of them have other options for classes too.
Monday, July 13, 2015
Hobo Pies
I had the best of intentions to catch up on blogging this summer, but I've been busy enjoying my newfound free time in other ways. So, while I have baked, I haven't gotten to the blogging part yet. Until now, that is.
This is one of my favorite summer recipes: hobo pies. Every year I look forward to camping—the time that we usually make hobo pies—so that I can eat my fill. It's been two years since I went camping and I'm not going this year, so I was delighted when my aunt suggested making them in their fire pit.
In case you aren’t familiar with hobo pies, I’ll explain.
Hobo pies are grilled cheese sandwiches parading as campfire food. They are made in a hobo pie maker, which consists of two bread-shaped pieces of iron with long handles. Buttered bread and some choice toppings go inside the iron part. The hobo pie maker is put in the fire until the hobo pie is crispy on the outside, hot and melty on the inside.
Everyone looks forward to hobo pie night when we’re camping! We usually do pizza hobo pies for dinner, and blueberry marshmallow hobo pies for dessert. However, the filling choices are practically endless.
Neither I nor google is exactly sure where the name "hobo pies" came from (hobos sitting around a campfire making a simple dinner?), so, without further ado, here is the recipe.
Pizza Hobo Pies
Ingredients:
Sandwich Bread
Butter, for spreading on bread
Pizza sauce
Mozzarella Cheese
Pizza toppings (ham, pineapple, pepperoni, ground sausage, onions, peppers, etc.)
Directions:
1. Spread butter on two pieces of bread. Put bread in hobo pie makers, buttered side facing the iron.
2. Spread sauce on one or both pieces of bread. Sprinkle mozzarella cheese on one of the pieces of bread. Put desired toppings on top of the cheese.
3. Put the hobo pie maker back together—it works best if the iron with the piece of bread without toppings is tipped over onto the iron holding the bread with toppings.
4. Put hobo pie maker into the coals of a bonfire; after about 3 minutes (depending on how hot the coals are), check the piece of bread facing the coals, and check about every minute after that until the bread is golden brown. Once golden brown, turn the hobo pie maker over so that the other piece of bread is facing down.
5. Remove from fire when both pieces of bread are golden brown. Be careful with the hobo pie maker when dumping out the hobo pie; it will be extremely hot. Be sure to place the hobo pie maker where it won't melt anything or burn someone. Wait 1-2 minutes when it is cooler to eat the hobo pie.
Dessert Hobo Pies
Ingredients:
1 can of pie filling (blueberry, cherry, etc.)
Marshmallows or marshmallow fluff
Directions:
1. Spread butter on two pieces of bread. Put bread in hobo pie makers, butter side facing the iron.
2. Spread pie filling on one or both pieces of bread. Spread marshmallows or marshmallow fluff on the pie filling (marshmallows work better if they are torn up).
3. Put the hobo pie maker back together and proceed the same way you would make pizza hobo pies.
This process can be replicated with any fillings, such as ham and cheese.
This is one of my favorite summer recipes: hobo pies. Every year I look forward to camping—the time that we usually make hobo pies—so that I can eat my fill. It's been two years since I went camping and I'm not going this year, so I was delighted when my aunt suggested making them in their fire pit.
In case you aren’t familiar with hobo pies, I’ll explain.
Hobo pies are grilled cheese sandwiches parading as campfire food. They are made in a hobo pie maker, which consists of two bread-shaped pieces of iron with long handles. Buttered bread and some choice toppings go inside the iron part. The hobo pie maker is put in the fire until the hobo pie is crispy on the outside, hot and melty on the inside.
Everyone looks forward to hobo pie night when we’re camping! We usually do pizza hobo pies for dinner, and blueberry marshmallow hobo pies for dessert. However, the filling choices are practically endless.
Pizza Hobo Pies
Ingredients:
Sandwich Bread
Butter, for spreading on bread
Pizza sauce
Mozzarella Cheese
Pizza toppings (ham, pineapple, pepperoni, ground sausage, onions, peppers, etc.)
Directions:
1. Spread butter on two pieces of bread. Put bread in hobo pie makers, buttered side facing the iron.
2. Spread sauce on one or both pieces of bread. Sprinkle mozzarella cheese on one of the pieces of bread. Put desired toppings on top of the cheese.
3. Put the hobo pie maker back together—it works best if the iron with the piece of bread without toppings is tipped over onto the iron holding the bread with toppings.
4. Put hobo pie maker into the coals of a bonfire; after about 3 minutes (depending on how hot the coals are), check the piece of bread facing the coals, and check about every minute after that until the bread is golden brown. Once golden brown, turn the hobo pie maker over so that the other piece of bread is facing down.
5. Remove from fire when both pieces of bread are golden brown. Be careful with the hobo pie maker when dumping out the hobo pie; it will be extremely hot. Be sure to place the hobo pie maker where it won't melt anything or burn someone. Wait 1-2 minutes when it is cooler to eat the hobo pie.
Dessert Hobo Pies
Ingredients:
1 can of pie filling (blueberry, cherry, etc.)
Marshmallows or marshmallow fluff
Directions:
1. Spread butter on two pieces of bread. Put bread in hobo pie makers, butter side facing the iron.
2. Spread pie filling on one or both pieces of bread. Spread marshmallows or marshmallow fluff on the pie filling (marshmallows work better if they are torn up).
3. Put the hobo pie maker back together and proceed the same way you would make pizza hobo pies.
This process can be replicated with any fillings, such as ham and cheese.
Wednesday, May 20, 2015
Soft and Chewy Chocolate Cookies
We need to celebrate, because I JUST FINISHED MY IB EXAMS!
Sorry for shouting, but it really is very exciting. Two years of work, then 14 exams—it was no walk in the park. And now all that’s left to do is celebrate!
And these cookies are totally celebration-worthy. They’re soft and chewy, and chocolatey enough to satisfy even me.
I loooove these cookies. Let me tell you why!
The aroma floating out of the oven when they are baking is mouthwatering. I could hardly wait five minutes for them to cool enough not to burn all of my taste buds off, but finally I was able to bite into one of these cookies. Warm, gooey, chocolatey—it was better than I imagined it could be. Words cannot describe these cookies. Why did it take me so long to make chocolate cookies?
These are truly the perfect chocolate cookie. You can switch out the caramel-filled chocolate chips for peanut butter chips, mint chips, oreos…you name it. They’re even good enough that you could eat them plain. Once baked, they stay soft for daaaays. Also, you can freeze both the unbaked cookie dough balls and the baked cookies, which means you can satisfy your cookie cravings any time at a moment’s notice!
However, you must make them right, or you won’t have the perfect cookies.
Use room temperature butter and (if you can) eggs. They combine more smoothly with the other ingredients so that everything mixes together into one nice, consistently chocolatey dough.
Chill the dough. If you skip this step, the dough will be too sticky to handle and the cookies won’t be as thick (sad face).
When you remove the cookies from the oven, they’re going to look under-baked. I know. Just let them cool on the cookie sheet for 5 minutes to finish baking, then transfer them to a wire rack to finish cooling. On the other hand, if you leave them too long on the cookie sheet, they might start to get hard and crispy—which is ok if that is what you like.
These rows of cookies are unconventional—we're living on the edge today.
5 minutes on the pan, then stuff as many cookies as you like into your mouth. Your taste buds deserve to be able to taste these cookies at their best.
Aaaaand serve. Sorry about the feet—it's spring in Moscow.
Soft and Chewy Chocolate Cookies
Prep: 15 minutes, Chill: 2 hours, Bake: 12 minutes
Total: 2.5 hours
Yield: 16 large or 36 small
Recipe from: http://sallysbakingaddiction.com/2013/04/21/inside-out-chocolate-chip-cookies/
Sorry for shouting, but it really is very exciting. Two years of work, then 14 exams—it was no walk in the park. And now all that’s left to do is celebrate!
And these cookies are totally celebration-worthy. They’re soft and chewy, and chocolatey enough to satisfy even me.
I loooove these cookies. Let me tell you why!
The aroma floating out of the oven when they are baking is mouthwatering. I could hardly wait five minutes for them to cool enough not to burn all of my taste buds off, but finally I was able to bite into one of these cookies. Warm, gooey, chocolatey—it was better than I imagined it could be. Words cannot describe these cookies. Why did it take me so long to make chocolate cookies?
These are truly the perfect chocolate cookie. You can switch out the caramel-filled chocolate chips for peanut butter chips, mint chips, oreos…you name it. They’re even good enough that you could eat them plain. Once baked, they stay soft for daaaays. Also, you can freeze both the unbaked cookie dough balls and the baked cookies, which means you can satisfy your cookie cravings any time at a moment’s notice!
However, you must make them right, or you won’t have the perfect cookies.
Use room temperature butter and (if you can) eggs. They combine more smoothly with the other ingredients so that everything mixes together into one nice, consistently chocolatey dough.
Chill the dough. If you skip this step, the dough will be too sticky to handle and the cookies won’t be as thick (sad face).
When you remove the cookies from the oven, they’re going to look under-baked. I know. Just let them cool on the cookie sheet for 5 minutes to finish baking, then transfer them to a wire rack to finish cooling. On the other hand, if you leave them too long on the cookie sheet, they might start to get hard and crispy—which is ok if that is what you like.
Let the rest finish cooling for later!
Aaaaand serve. Sorry about the feet—it's spring in Moscow.
Soft and Chewy Chocolate Cookies
Prep: 15 minutes, Chill: 2 hours, Bake: 12 minutes
Total: 2.5 hours
Yield: 16 large or 36 small
Recipe from: http://sallysbakingaddiction.com/2013/04/21/inside-out-chocolate-chip-cookies/
Thursday, April 30, 2015
Tiny Strawberry Cream Scones
Truth:
That is the reason that three strawberry cream scones disappeared into my stomach as soon as they came out of the oven (I also ate strawberry shortcake right before that...FOR DINNER).
These scones are really cute with little strawberry pieces sticking out of their golden-brown tops, but there's much more to them than just looks. They're quick and easy to mix up, smell heavenly while baking, are soft, tender, and moist beyond belief, and taste amazing.
Celebrate spring with these scones (it's finally coming to Moscow)! Eat them for breakfast, eat them for snack, eat them for dessert...find any excuse you can to make them. They're that good.
Tiny Strawberry Cream Scones
Makes: 20-24 small scones
Recipe from: http://joythebaker.com/2014/04/tiny-strawberry-cream-scones/
Originally adapted from: http://www.kingarthurflour.com/recipes/cream-tea-scones-recipe
Calories do not exist if you eat when no one is looking.
That is the reason that three strawberry cream scones disappeared into my stomach as soon as they came out of the oven (I also ate strawberry shortcake right before that...FOR DINNER).
In my defense, yesterday was my last day of high school (!), which I personally believe is worthy of celebration (in my world that means eating as much delicious food as I can). I still have to survive three weeks of IB exams, but after I graduate I get to repeat with the celebrations. Yay!
These scones are really cute with little strawberry pieces sticking out of their golden-brown tops, but there's much more to them than just looks. They're quick and easy to mix up, smell heavenly while baking, are soft, tender, and moist beyond belief, and taste amazing.
In addition to strawberries, there's also white chocolate chips in these, but they're optional. Okay, let's be realistic, they're totally not optional! They compliment the strawberries and cream so well that I know I'll be adding them every time.
Celebrate spring with these scones (it's finally coming to Moscow)! Eat them for breakfast, eat them for snack, eat them for dessert...find any excuse you can to make them. They're that good.
Tiny Strawberry Cream Scones
Makes: 20-24 small scones
Recipe from: http://joythebaker.com/2014/04/tiny-strawberry-cream-scones/
Originally adapted from: http://www.kingarthurflour.com/recipes/cream-tea-scones-recipe
Thursday, April 16, 2015
Russian Hot Chocolate
To say "I love chocolate" would be an understatement. But get this—I didn't have my first sip of hot chocolate until I had traipsed this earth for 16 years.
And guess what? Chances are, you haven't had real hot chocolate at all. Now you're probably really confused, but let me clarify. Many people do not realize this, but there is a difference between hot chocolate and hot cocoa.
Hot cocoa is what we usually think of when we hear the words "hot chocolate". It is made with cocoa powder (hence the name hot cocoa) and sugar mixed with hot milk or water. It is more or less the consistency of milk—think hot, chocolate milk.
Hot chocolate, on the other hand, is much thicker and creamier than hot cocoa. As its name implies, it is made by melting chocolate into milk and cream. Because hot chocolate is rich, creamy, and thick beyond belief, it is wise to have a glass of water nearby. Hot chocolate has a much higher fat content than hot cocoa because it usually contains more dairy, and it is made using chocolate rather than cocoa powder. Hot chocolate is a popular drink in Russia and France.
The first time that I had real hot chocolate was at Shokoladnitsa, a Russian cafe chain that is very popular here in Russia. Because their hot chocolate is so intense, you can order just a teeny-tiny cup of it; but there are also bigger sizes of chocolatey bliss for more serious chocolate lovers (i.e. me!). No matter the size, though, it always comes with a glass of cold water, otherwise people would constantly ask for some.
It took awhile, but I've come to realize that in Russia, when you ask for hot chocolate, that is what you get. It is a big surprise for some foreigners when they see hot chocolate on the menu and they get a very rich, thick drink! If that's not your cup oftea hot chocolate, many places also offer hot cocoa.
Ever since taking my first sip of hot chocolate, I've wanted to try making it. It was difficult to find a recipe because many people call hot cocoa by the incorrect name of hot chocolate (though, I admit it, I'm guilty of this too, at times). But at last, I found what I was looking for on wellplated.com…a drink worthy of a cold, snowy, Russian winter day.
And guess what? Chances are, you haven't had real hot chocolate at all. Now you're probably really confused, but let me clarify. Many people do not realize this, but there is a difference between hot chocolate and hot cocoa.
Hot cocoa is what we usually think of when we hear the words "hot chocolate". It is made with cocoa powder (hence the name hot cocoa) and sugar mixed with hot milk or water. It is more or less the consistency of milk—think hot, chocolate milk.
Hot chocolate, on the other hand, is much thicker and creamier than hot cocoa. As its name implies, it is made by melting chocolate into milk and cream. Because hot chocolate is rich, creamy, and thick beyond belief, it is wise to have a glass of water nearby. Hot chocolate has a much higher fat content than hot cocoa because it usually contains more dairy, and it is made using chocolate rather than cocoa powder. Hot chocolate is a popular drink in Russia and France.
It took awhile, but I've come to realize that in Russia, when you ask for hot chocolate, that is what you get. It is a big surprise for some foreigners when they see hot chocolate on the menu and they get a very rich, thick drink! If that's not your cup of
Ever since taking my first sip of hot chocolate, I've wanted to try making it. It was difficult to find a recipe because many people call hot cocoa by the incorrect name of hot chocolate (though, I admit it, I'm guilty of this too, at times). But at last, I found what I was looking for on wellplated.com…a drink worthy of a cold, snowy, Russian winter day.
And honestly? It's not that difficult to make.

Rich Hot Chocolate
Servings: 3-4*
Ingredients:
1 1/2 cups whole milk
1/2 cup heavy cream
2 tsp. powdered sugar
1/2 tsp. espresso powder (optional; will intensify chocolate flavor)
1-2 tsp. vanilla, mint, or peppermint extract to taste (optional, choose one)
8 oz. bittersweet chocolate, at least 72%, chopped*
Optional Garnishes:
Whipped cream
Marshmallows
Peppermint sticks
Cinnamon sticks
Scoop of ice cream
Directions:
1. Over medium heat in a medium pot, whisk whole milk, heavy cream, powdered sugar, espresso powder, and extract. Heat until there are bubbles around the edges; do not allow it to boil.
2. Remove pot from heat and whisk in chopped chocolate until melted. Return to low heat if the chocolate is not melted completely.
3. Serve warm. For leftover hot chocolate: cool to room temperature, store in an airtight container, and refrigerate. Carefully reheat in microwave or in a pot over low heat.
*Just quarter the recipe for a single serving.
*Better chocolate yields better hot chocolate, so use the highest quality possible. Do not use chocolate chips.
Recipe from: http://www.wellplated.com/french-hot-chocolate/
You just need some chocolate. Pure chocolate.
But before chopping that magic up, get some cream and milk heating. It needs to be drinkable!

Then chop your chocolate...
...and add it to your warm cream and milk.
Whisk it up!
It will start to look something like this. Make sure it all melts before pouring it into mugs.
After all of the chocolate has melted and been stirred into the milk and cream, it will become a thick, dark, creamy, rich, chocolatey consistency, and you know it's ready.
Perfection in a cup.
Rich Hot Chocolate
Servings: 3-4*
Ingredients:
1 1/2 cups whole milk
1/2 cup heavy cream
2 tsp. powdered sugar
1/2 tsp. espresso powder (optional; will intensify chocolate flavor)
1-2 tsp. vanilla, mint, or peppermint extract to taste (optional, choose one)
8 oz. bittersweet chocolate, at least 72%, chopped*
Optional Garnishes:
Whipped cream
Marshmallows
Peppermint sticks
Cinnamon sticks
Scoop of ice cream
Directions:
1. Over medium heat in a medium pot, whisk whole milk, heavy cream, powdered sugar, espresso powder, and extract. Heat until there are bubbles around the edges; do not allow it to boil.
2. Remove pot from heat and whisk in chopped chocolate until melted. Return to low heat if the chocolate is not melted completely.
3. Serve warm. For leftover hot chocolate: cool to room temperature, store in an airtight container, and refrigerate. Carefully reheat in microwave or in a pot over low heat.
*Just quarter the recipe for a single serving.
*Better chocolate yields better hot chocolate, so use the highest quality possible. Do not use chocolate chips.
Recipe from: http://www.wellplated.com/french-hot-chocolate/
Subscribe to:
Posts (Atom)