Sunday, August 13, 2017

Almond Poppyseed Bread

How has your summer been? Hot? Sunny? Full of trips to the lake or pool? Lots of eating ice cream out of the tub while no one's looking?
I hope so!


I've had a great summer. Super-duper-uber busy (which is why I haven't blogged in awhile...) and full of successes and fails, but great all the same.


Successes include learning how to say "go to the fingerprinting window" in Chinese, biking an hour to work in Taiwan's intense heat a few times, and surviving my trip to Japan (which was my first trip abroad in which only my sister--no grown ups--accompanied me, and which we planned ourselves).


Fails include making frosting with cornstarch instead of powdered sugar (sooo not tasty), milk not curdling during an attempt at homemade ricotta, going waaay past our bus stop resulting in a taxi ride, aaaand not writing any blogs.

All in all, it could have been worse.


But what's always a success is this poppyseed bread. It's a family recipe--we've been making it for years. Last summer I made it for dessert when some guests came over, and they were just amazed that 1) we served bread for dessert and 2) that it tasted so freaking fantastic!

I think what makes this poppyseed bread stand out is the combination of the almond extract in the bread and the orange juice in the glaze. It makes for such a surprising but tasty combo!

So, without further ado, here is the recipe for what is definitely one of the best poppyseed-filled foods I have ever eaten.

Almond Poppyseed Bread
Makes: 2 loaves

Ingredients:
3 cups flour
1 1/2 cups milk
2 1/2 cups sugar
3 eggs
1 1/2 tsp. vanilla
1 1/2 tsp. baking powder
1 1/2 tsp. almond extract
1 1/2 tsp. salt
1 cup + 2 Tbs. canola oil
1 1/2 Tbs. poppy seeds

Glaze:
3/4 cup powdered sugar
1/4 cup orange juice
2 tsp. melted butter

Directions:
In a large bowl, combine all ingredients and beat with an electric mixer on medium for 2 minutes, or until combined.
Pour into 2 greased small loaf pans.
Bake 1 hour at 350ºF.
Cool for 10 minutes in pans while making glaze.
Remove loaves to wire rack and pour glaze over loaves while still warm.

Wednesday, January 4, 2017

Basic Hummus

Happy New Year!


Actually, I don't really like New Years all that much. Shocker, I know.

It's just that it's an entire holiday revolving around staying up late, loud noises, and crowds. And if you know me at all, I can't stand any of those things. This year, I stayed up just late enough to go up to the near-empty roof of our apartment and watch fireworks go off at midnight, then I went to bed. That was enough to satisfy me.


Also, last complaint, it's pointless to make resolutions just to break them. Do you know how many people do that?! Plus, is one big decision to change really going to be very effective??

Ok, I'm done ranting. And I've got a recipe for those of you who made the resolution to eat healthier: hummus!
In case you haven't heard it before, this mediterranean food has fantastic health benefits includingbut definitely not limited tobeing high in fiber, protein, and iron, helping lower cholesterol, and even helping prevent some cancers. But remember, all things in moderation: it's pretty high in calories (I definitely don't take my own advice on this point...).


Hummus is surprisingly easy to makebasically, you just toss all of your ingredients into the food processor and BAM you've got hummus. This is a simple, basic hummus recipe that my family really likes. We've tried some more elaborate recipes that just weren't as good. But that's our tastebudsyours may be different, which is why it's such a great thing that hummus can easily be adjusted to spice it up! And, have extra hummus? Just throw it in the freezer.

Plus, it's super versatile. Here's some ideas on what to eat it with:
-Dip pita bread, pita chips, or veggies in it
-Spread it on a sandwich or wrap
-Dollop it over your salad
-Put it on a burger

I've used Smitten Kitchen's whole wheat pita bread recipe a few times before, and it's turned out pretty tasty every time. Ours didn't puff up as much as the pictures, but that is probably because we skimped on a lot of the rising. We probably rise it for about an hour in a very warm place, then pretty much completely skip the second and third rises after they are shaped into disks. To bake, we use a baking sheet, sprinkle them with water, and do not let the oven reheat each time we open it. I don't have time to wait for pita to puff...so they may not be perfect, but they are tasty!


Isn't hummus just about the perfect food???

So, whether you've made a resolution to eat healthier or not, hummus is a good option!

Hummus
Time: 15 minutes
Makes: 2 1/2 cups

Notes:
-I have successfully used limes instead of lemons in this recipe.
-I have also successfully used homemade tahini (sesame seed paste) in this recipe.
-Do not confuse Mediterranean sumac with poisonous American sumac.
-There is a way to use dried chickpeas if you have those on hand.

Recipe from: http://altonbrown.com/hummus-recipe/


Nutritional information from: http://www.naturalnews.com/049453_hummus_iron_fiber.html

Tuesday, December 27, 2016

"Nem": Vietnamese Fresh Spring Rolls

The week leading up to Christmas my family spent in Vietnam, as I mentioned before. Three days in Hanoi, three days on a cruise in Ha Long Bay. The cruise was amazing--it was so peaceful to sit up on the deck of our boat and watch the rocky islands rise out of the mist and loom by. We had ample time to sit and enjoy as there were only a few activities planned: rowing around a floating fishing village, kayaking among the islands, touring a pearl farm, and making spring rolls.

The spring roll-making demonstration took place before dinner on both nights, and we learned how to assemble Vietnamese nem (spring rolls). We made fresh spring rolls, so that we could devour them immediately. My spring roll-making-skills definitely improved on the second night!


To make fresh nem, first you need rice paper. Handmade rice paper is best because it is easier to use. You simply lay it on a damp washcloth while preparing the spring roll so that it becomes more pliable. If the rice paper is handmade, it will have a pattern on it from the mold. Rice paper that is not handmade has to be soaked in warm water for about 20 seconds before using, which makes it stickier and more difficult to roll.

There are many things that can be put in fresh nem, but whatever ingredients chosen, it is best if they are in strips so that the spring rolls are not as bulky and have fewer air pockets. Any meats or eggs should, of course, be pre-cooked. We used carrots, lettuce, strips of scrambled eggs, shrimp, and special Vietnamese pork.

For a dipping sauce, they had a special homemade sauce which cannot be found in stores. They casually listed the ingredients while explaining the spring roll process, and I had to frantically write them down. So, since it is a simple list and I have not yet tried making it at home, I'm not sure of proportions. When I make it, I'll update it. However, you can experiment with it as you like! It may be worth trying because the sauce on the boat was really tasty and perfected the spring rolls, in my opinion.
Here are the ingredients, and let me know how it goes if you use them to make a sauce!

Spring Roll Dipping Sauce
2 parts water
1 part fish sauce
1 part rice vinegar
Garlic
Chilies
Lime juice
Sugar

To assemble the nem, you lay a piece of rice paper on a damp washcloth, then you make a small pile of ingredients near the base of the rice paper. You do not want to use too many ingredients!! We saw a lot of people load them to bursting, and lets just say that their spring rolls were, I'm sure, yummy but not pretty. Also, it is easiest to put all of the ingredients in a pile on the rice paper, not in a carpet across the paper. Once all of the ingredients are on the rice paper, start rolling it up very tightly. When rolled halfway, fold the edges into the center, and finish rolling. Then, rub a little water on the edge of the rice paper to glue it down. Or, you can lick it, and, as our guide explained, no one will steal your spring roll. Finally, dip your spring roll into the sauce for a few seconds so that the sauce seeps into your spring roll. If you do a quick dip, it won't have as much flavor and will be more difficult to take a bite of.

This is a really fresh and simple treat, and is fun to make. Enjoy!

Monday, December 26, 2016

Pumpkin Muffins

How was your Christmas?


Ours was wonderful. I'm in Taiwan with my family, but we took a week before Christmas to vacation in Vietnam. It was amazing! We tried a lot of ethnic food, which did some pretty sketchy things to our stomachs--fried corn, pho, fish stir fry at a restaurant which Obama ate at, and more seafood than I've ever eaten in my life. We're ok though, so no regrets. We spent a few days on a boat cruising through Ha Long Bay, one of the seven natural wonders of the world. The rocky islands rising out of the mist are surreal.


We came back to Taiwan on the 24th and three minutes after we stepped foot in the apartment, my mom and I were in the kitchen, making breadsticks, zuppa toscana, and peppermint ice cream for our Christmas Eve dinner.

Christmas Day was filled with monkey bread, cookies, steak, wrapping paper, and Christmas music.


Now it's Boxing Day, as they say in New Zealand. A day to relax, enjoy the new presents, and do a little more baking. Pumpkin muffins are an easy and tasty treat if you're looking for something to make today, like me. They're tender, not too crumbly, and just a little bit sweet. I love the seeds and the crumble because it gives them more yummy flavor and texture. The raisins too, except that we usually leave them out because SOME PEOPLE who shall not be named do not like them. *Ahem* But we devour these muffins at every opportunity--breakfast, second breakfast, lunch, snack, dessert, midnight snack... They're healthy enough that it's justified. Right?


This is a recipe that is always in our fall-winter recipe rotation. They're just so warm and comforting! I actually took these pictures a few years ago and have been meaning to share the recipe with you ever since, but that's neither here nor there. So, you'd better make up for lost time and get baking! Merry Christmas!

Pumpkin Crumble Muffins
Makes: 18 regular muffins

Ingredients:
2 cups all-purpose flour
2 tsp. baking powder
1/4 tsp. baking soda
1 tsp. ground cinnamon
3/4 tsp. ground ginger
1/8 tsp. ground allspice
1/8 tsp. ground cloves
1/2 tsp. salt
1/2 cup butter, melted and cooled
3/4 cup packed light brown sugar
3/4 cup canned pure pumpkin
1/4 cup well-shaken buttermilk*
2 large eggs
1 tsp. pure vanilla extract
1/2 cup raisins
3 Tbs. raw green (hulled) pumpkin seeds (pepitas), divided

Crumble Topping, optional:
1/2 cup flour
1/2 cup brown sugar
2 Tbs. butter, softened

Directions:
1. Preheat oven to 400ºF with rack in the middle. Butter muffin pan or use muffin papers.
2. In a large bowl, whisk together flour, baking powder, baking soda, spices, and salt.
3. In a medium bowl, combine butter, brown sugar, pumpkin, buttermilk, eggs, and vanilla. Add to dry ingredients and stir until just combined. Do not overmix.
4. Gently stir in raisins and 2 tablespoons pumpkin seeds.
5. Evenly divide batter among prepared muffin cups and sprinkle with remaining pepitas.
6. Make crumble topping: Combine ingredients in small bowl. Cut butter in until crumbly. Sprinkle onto tops of muffins.
7. Bake until a toothpick inserted in the middle comes out clean, about 20 minutes. Cool in muffin tin for 5 minutes, then remove from muffin tin and cool on a wire rack.

*To make 1 cup of buttermilk substitute: 1 Tbs. vinegar or lemon juice + just enough milk to make 1 cup. Let sit for five minutes before using.

Friday, November 4, 2016

Homemade Poppyseed Chicken

You know when you have a TON of work to do, but you're so overwhelmed that you just sit there and scroll through instagram (or write a blog...ha...ha...ha.....)?


Yep, that's me right now.

The end of the semester is approaching way too quickly--I have tests, projects, and papers due soon, I've committed to going to four large events just this weekend (and more next weekend), and yet, I'm sitting here in my favorite comfy chair, writing a blog like I don't have grades to worry about.

I think that there's just so much to do that I can't face it right now, not after a full day of classes. The only thing keeping me sane is what's beyond all of the work--Thanksgiving break and then Christmas break! I'm beyond excited to fill my grandma's kitchen with yummy fall smells in a few short weeks. It's so close, yet so far...

In the meantime, I have some good ol' fashioned comfort food for you, perfect for these colder and shorter days.


Poppyseed chicken! My mom used to make this a few times a year, and it was always so good. Creamy, warm, flavorful. While she used a much simpler recipe, I wanted to eliminate the questionable cans of soup that the original recipe involved, and make it completely from scratch. And all I can say is, there were no leftovers! Probably helps that we hadn't had it in years, though, huh?


Homemade Poppyseed Chicken
Serves: 4-5
Total time: 30 min

Recipe from: http://www.lecremedelacrumb.com/2014/11/poppy-seed-chicken-casserole.html

Monday, September 19, 2016

Homemade Marshmallows


Three weeks. I've only been in school for three weeks, but it feels like both an eternity and the blink of an eye.


I've been reuniting with friends, decorating my new room, battling spiders, getting used to school food and all of the school work, and trying to create a new routine. It's exhausting, yo. It makes me want dessert.

Luckily, friends, family, and church potlucks have come to my rescue. I've eaten way more than my share of cookies and other yumminess. But despite all of that, I do wish I could be in the kitchen making something of my own choice (and licking the beater while I'm at it...). Something like these marshmallows...


I made these marshmallows during the precious last weeks of summer. Friends departing post had given us a box of gelatin, and as soon as I saw it my crazy baker's heart claimed it as mine, and mine alone for marshmallows (not that anyone else really wanted it...).


I did a lot of research to find the right marshmallow recipe. Usually, marshmallows are made with corn syrup. Well, let me tell you somethin'. Ain't no such thing as corn syrup in Taiwan, and after a bunch of reading, I was pretty convinced that substitutes (which weren't available either anyway) also wouldn't work. What to do? After some searching, I discovered that some recipes use evaporated milk, which we just happened to have a can of stashed away! And, bonus, evaporated milk is a bit healthier than corn syrup.


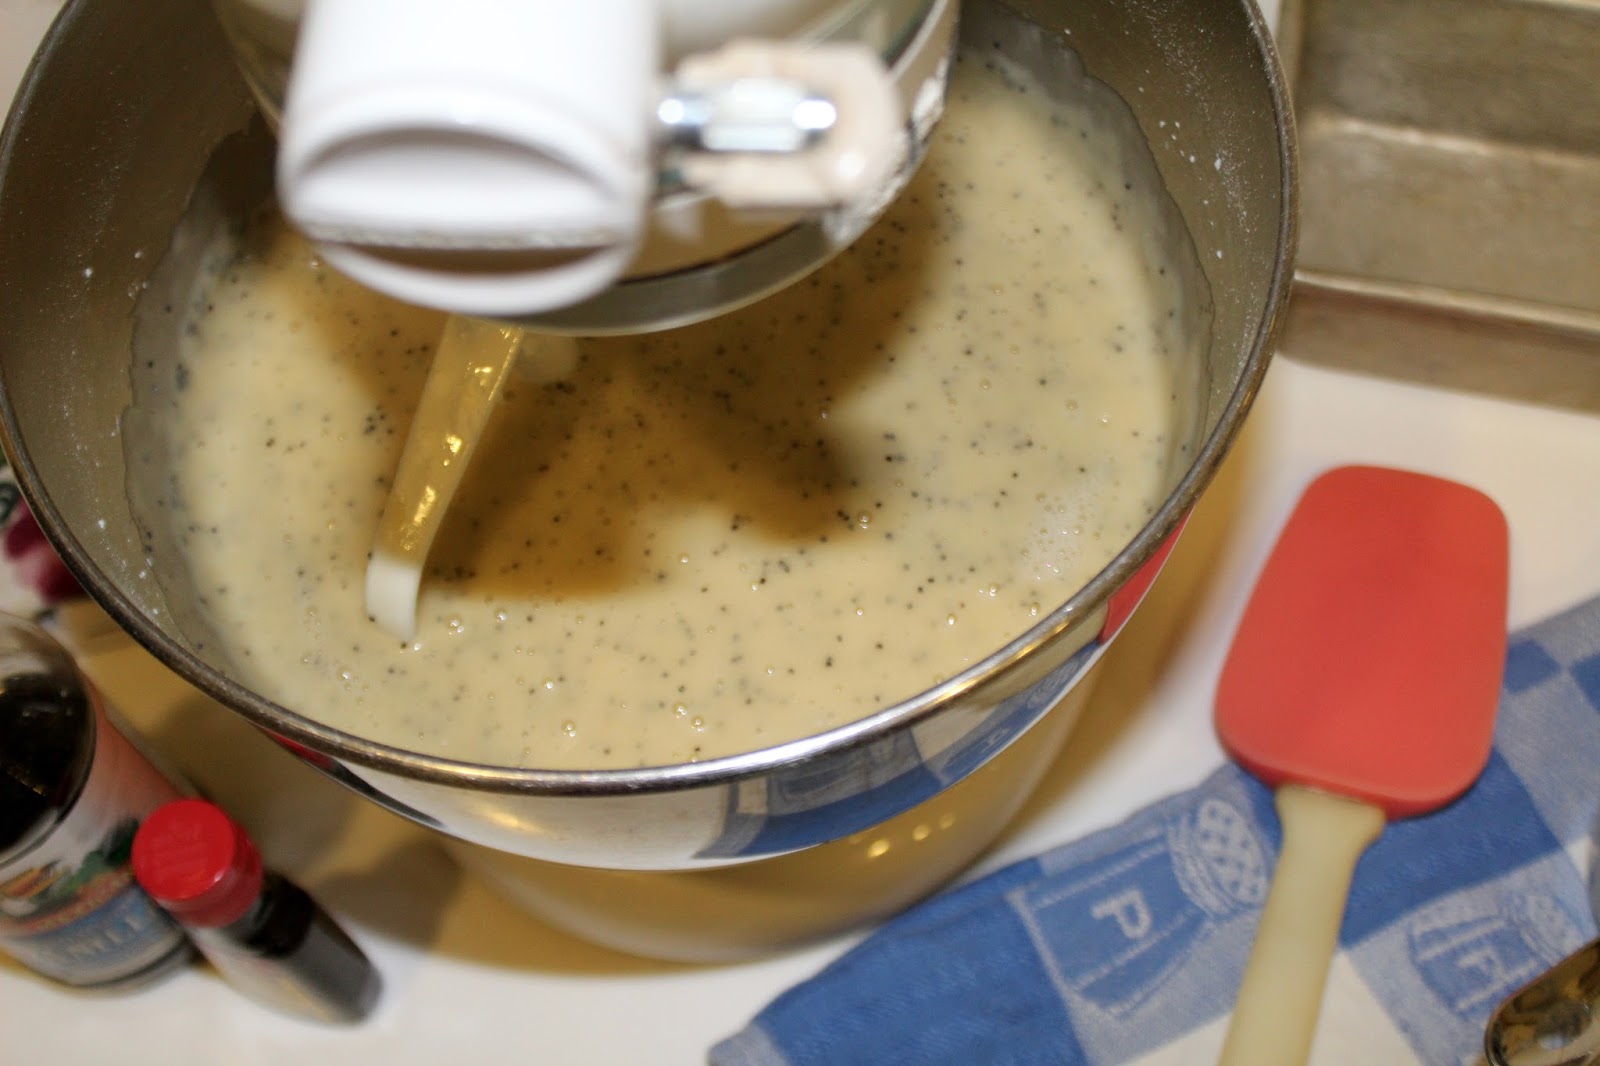
So, to the kitchen I went. There were a lot of steps, but I took them one at a time. I was a bit nervous about the mixture heating on the stove since it never got *quite* up to the right temperature, but it didn't seem to make a difference in the final product. Also, I made the wonderful decision to use Mexican vanilla in these, and the flavor out outstanding. Multiple people wondered aloud what that rich cinnamon-y, vanilla-y flavor was.


Marshmallows are fantastic for a number of reasons. They are SO versatile. Switch out vanilla for another extract, add food coloring, add mix-ins, cut into shapes. For next time, I'm thinking maybe some white chocolate chip pumpkin spice marshmallows for fall, or pink peppermint chocolate chip marshmallows for Christmas, or what about dark chocolate dipped almond marshmallows?? *Swoon*


Now, you may be thinking "These sound fantastic! I'll make a double batch!!" But do not listen to that tiny voice in your head! At least not the first time you make these, because this recipe makes A LOT of marshmallows. I gave away at least 4 bags with 10 small marshmallows each, and we had about 20 more marshmallows for ourselves. However, if you must give in, these marshmallows are supposed to freeze well (though I haven't tried it myself).


In case you need inspiration on how to eat these little nuggets of delight:

-Make s'mores (but let the marshmallows dry out in the open air for a few days previously so that the outsides don't melt away when exposed to heat).
-Plop a giant handful into your hot chocolate. They melt quite nicely!
-Give away in cute gift bags. I did this, and people LOVED it! It's a unique gift, and when you tell your friends that they're homemade, their eyes will pop!
-Serve for dessert. Dip them in chocolate if you wish, but these really are good enough to stand alone as dessert.


Excuse all of the pictures, I got a little snap-happy! These marshmallows are pillowy soft and sweetly delicious. Don't wait to make them!

Homemade Marshmallows
Makes: 50 small or 30 medium

A few notes about this recipe:
-The vanilla makes the marshmallows a little bit tan-colored. Use clear vanilla or another type of extract for a purer white color, or cover up the color with food coloring.
-You will want a candy thermometer to make these. There's just no other sure way to tell when they're ready to come off the stove.
-If you want to toast them, let dry in the open air for a few days beforehand so that the outsides dry a little bit and don't melt immediately.

Recipe from: http://www.asweetpeachef.com/sweets/homemade-marshmallow-recipe/

Tuesday, August 2, 2016

Homemade Thin Mints

So, yesterday I was making dinner and stepped on a turtle.


Wait, let me rewind.

We have this adorable little triscuit-sized turtle (named Triscuit, hehe) which swims around in a fancy-shmancy bowl that we keep outside, away from the saber toothed-cat that likes to play with the turtle. But Sunday night, the turtle was inside after a bowl cleaning.

We went to bed, forgetting about Triscuit, and in the morning, realized our grave mistake.


Sometime during the night, monster-cat Mao flipped Triscuit out of his peaceful home and onto the floor, and we went crazy trying to find him before work. Alas, he was lost in the (relative) vastness of our apartment.
Fast forward to when I returned home and started making dinner, listening to my siblings trying to find Triscuit. "Tristcuit, you get back here right now!" my sister declared.
As if by magic, a few seconds later, my piggy toe landed on something hard and unusual. My subconsciousness knew what it was, and as I looked down, I shrieked. Triscuit.


So, the lost was found, but my piggy toe is still a little freaked out. Look, don't touch, is my policy when it comes to turtles.

Which leads me to what else is triscuit-sized but doesn't freak me out. Thin mints! The wonderful chocolate-mint girl scout cookie that is always there for you. Actually...no they're not. They're only sold at rare, magical times throughout the year. BUT, they can always be there for you if you know this recipe! 'Cause it's pretty dang close to the real thing--in fact, better.

So apparently it's a thing to keep thin mints in your freezer. I have never tried it, but I have tried keeping these homemade thin mints in the fridge, and they were fantastic--so crisp and minty, with an indulgent coat of chocolate. So I definitely suggest cooling them. Definitely.


A few notes about the recipe before you get baking. I didn't include the original recipe here because Sally's post is so comprehensive. She's amazing, yo. But, here are a few things that I learned while making them.
You CAN use chocolate chips instead of bars of semi-sweet chocolate. They don't melt as well, but just mix them often while melting, and do not burn them. Trust me, not pretty.
I used a fork to dip my cookies into the chocolate, as suggested. However, the tapping part did not go so well since the chocolate chips melted into a pretty thick liquid. What did work was after dipping a cookie, I smoothed the chocolate over the cookie with my finger while balancing the cookie on a fork. Messy, but they ended up with a rustic charm.
As I finished chocolate coating a few cookies, I popped them into the freezer for a few minutes to harden up before stacking them all together in the fridge. Didn't want that chocolate to smudge!

So, with that, get baking!


P.S. Watch where you step in the kitchen. I don't make this stuff up ^^

Find the recipe at: http://sallysbakingaddiction.com/2016/03/09/homemade-thin-mint-cookies/