Sunday, January 11, 2015

Alton Brown's Curry Chicken Pot Pie

Do you remember those little foil pie tins filled with frozen chicken pot pie, that you would just pop into the oven for about a half hour for an easy meal?

We used to love those things—that is, until we made Alton Brown's curry chicken pot pie. Then, after several years of only eating this homemade pot pie with not one frozen pie in sight, my sister and I tried the frozen pot pies again.
And I must say, bleh—as a result of those little frozen pies shining so bright in our memories, we expected too much out of them; they tasted pretty flavorless to our now-enlightened palates.


Curry chicken pot pie has been one of our go-to favorites ever since we discovered it, and there is enough for the whole family. However, this chicken pot pie is different from others in a few ways: 1. It is crustless except for the puff pastry that is laid on top of the vegetables and chicken—which makes it easier to make, and 2. It contains curry for a nice, different flavor.

Like I said, this pot pie is pretty easy to make.


Just cook some vegetables until they're nice and golden brown.


Make your curry sauce by sweating your onions and celery in butter and cooking out the water, adding flour and curry, whisking in milk and chicken broth, and adding some salt, pepper, and parsley for flavor.


Combine the sauce and vegetables in a casserole dish.


Spread on the puff pastry.


Cut a whale, a cupcake, and two cats out of the extra puff pastry.
Just kidding—only if you feel like it.


Bake until a beautiful golden brown.


Enjoy!

Alton Brown's Curry Chicken Pot Pie

Ingredients:
4 cups frozen vegetable mix (peas, carrots, corn)*
1 to 2 Tbs. canola oil
3 Tbs. butter
1 cup chopped onion
1 cup chopped celery
1 1/2 cups low sodium chicken broth
1/2 cup milk
Tbs. flour
tsp. curry powder
Tbs. dried parsley
1 tsp. salt
1/2 
tsp. fresh ground pepper
2 cups cubed cooked chicken
1 package puff pastry

1. Preheat oven to 400ºF.
2. Toss the frozen vegetables with canola oil to evenly coat; spread onto a jelly roll pan. Place under broiler on high until golden, about 3 minutes.
3. In a sauté pan, heat 1 tablespoon of butter, then add the onion and celery to sweat them.
4. In a small pot on medium heat, warm the chicken broth and milk.
5. To the celery mix, add 2 more tablespoons of butter; cook out the water. Add the flour and curry, cooking for 1 to 2 minutes.
6. Whisk the milk mixture into the celery mixture and cook until thickened.
7. Add parsley, salt, and pepper. Mix in the browned vegetables and the chicken.
8. Pour sauce mixture into a large casserole dish. Lay a sheet of puff pastry over top as a crust.
9. Cook in the oven for 25 minutes, until the puff pastry is golden brown and the sauce is hot and bubbly.

*Various other types of vegetables may also be used. If using fresh rather than frozen carrots, they will need to be chopped into small pieces about the same size as the other vegetables being used, and will need to be baked for about 10 minutes at 350ºF before being broiled with the other vegetables to avoid crunchiness.

Recipe from: Alton Brown, 
http://www.foodnetwork.com/recipes/alton-brown/curry-chicken-pot-pie-recipe.html

Saturday, January 10, 2015

Pigs in a Blanket

These were practically gold when I was little, so rare did we get them and so good did they taste.


There was a certain satisfaction in eating food with our hands—to pick up tasty little sausages wrapped in warm, buttery crescent rolls, and pop them into our little mouths, all the while thinking about what a nice name "pigs in a blanket" is.

Well, maybe if you really think about, it's not such a nice name (you're eating cute little piggies while they're sleeping?)—but at least it makes sense.


They were one of those foods that we rarely had, but all loved. I liked to help make them—popping open the tube of crescent rolls never got old—but I loved eating them. I always wished that I had room for more.


I remember one particular day that I didn't feel very well around dinner time, and therefore wasn't very hungry; I was devastated when I found out that we were eating pigs in a blanket for dinner—how was I supposed to be fully satisfied until next time we had them for dinner if I couldn't eat them now?
I solved the problem by eating as many as I wanted anyways.


We haven't had pigs in a blanket for years because of the lack of canned crescent dough overseas; however, this time we made our own crescent rolls. While they were good, I must say that canned crescent rolls are better. I need to keep looking for the perfect copycat recipe! Until then, if you are also unable to buy canned rolls, I suggest the recipe on Home Cooking Adventure, which is what we used.

Pigs in a Blanket
Makes: 8

Ingredients:
1 can (8 oz.) crescent rolls
8 breakfast sausage links

Directions:
1. Preheat oven to 375ºF. Grease a cookie sheet; set aside.
2. Cook sausages according to the package directions. Set aside.
3. Open the tube of crescent rolls and separate the triangles, laying them flat. Lay a sausage on the wide end of one of the triangles and roll the dough around it. Place rolled sausage on the prepared pan; be sure to put the pointy end of the crescent roll under the rolled sausage and touching the pan, so that the roll does not come unraveled. Repeat with remaining sausages.
4. Bake in the oven for about 10 minutes, until golden brown.
5. Serve plain, or dip in mustard or maple syrup.

Wednesday, January 7, 2015

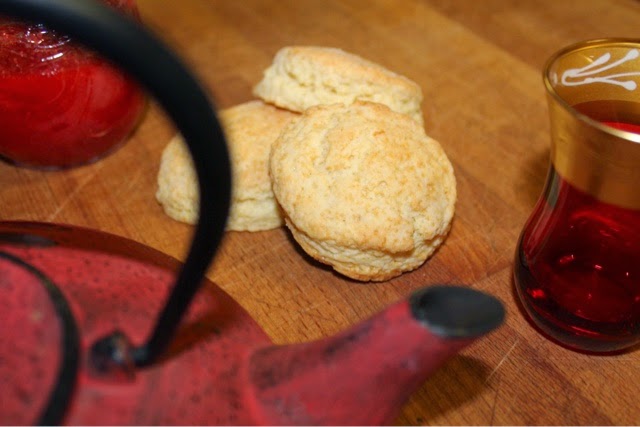
Scones

When I think of scones, I think of fine ladies wearing silk dresses and big hats while eating dainty snacks and drinking tea out of ornate china with their pinkies in the air. It is tea time in Britain (in the 1800s, of course).


Scones may seem very fancy, but don't worry, they are actually super easy to make. In fact, they are closely related to the American biscuit; both require similar ingredients and preparation methods. So what is the difference between the two?

Scones originated in Scotland, whereas biscuits are American.
Scones are slightly sweeter, and are eaten for breakfast or tea while biscuits are eaten with meals.
Scones may be flavored with various mix-ins, such as chocolate, cinnamon, or fruit and may be eaten with jam, butter, lemon curd, or cream; biscuits are usually eaten plain or may be used to soak up gravy.


If a scone is not made right, it can be dry, hard, and crumbly...yuck! But if a good recipe is used (like the one below, from Alton Brown), and they are not over mixed and nothing else crazy happens, they will have a crispy outside and a soft, flaky inside. They are absolutely delicious eaten warm, but they are good cold as well.


Scones
Makes: 12-16
Total time: 30 minutes

Ingredients:
2 cups flour
4 tsp. baking powder
3/4 tsp. salt
1/3 cup sugar
4 Tbs. cold butter
2 Tbs. shortening (or butter if no shortening is available)
3/4 cup cream
1 egg, beaten
1 handful of mix-ins (optional, e.g. chocolate chips or dried fruit)

Directions:
1. Heat oven to 375ºF. Grease a large baking sheet; set aside.
2. In a large mixing bowl, stir together flour, baking powder, salt and sugar until fully combined.
3. Cut in butter and shortening using a fork or a pastry cutter.
4. In a separate bowl, combine cream with beaten egg; add to dry ingredients. Stir in mix-ins, if used. Mix until just combined, being careful not to over-mix.
5. Place dough on a floured surface. With a floured rolling pin, roll dough into a 3/4 to 1 inch thick sheet. Cut into biscuit-sized rounds and place on prepared baking sheet.
6. Bake for 15 minutes or until the tops are golden brown. Cool on pan for 2 minutes before transferring to a wire rack to finish cooling.

Recipe from: Alton Brown, 
http://www.foodnetwork.com/recipes/alton-brown/scones-recipe.html
Scone history from: http://www.marthastewart.com/874314/marthas-column-scones

Sunday, January 4, 2015

Chicago-Style Deep Dish Pizza

We always make our pizza from scratch because there's just not that many other options in Russia. I try to make sure that we have a reasonably thick crust, but it comes no where near deep dish pizza in thickness or in flavor.
That's why when Elena and I both drooled over a new Chicago-style pizza recipe from one of my favorite bakers earlier this week, we decided that we needed to make it ASAP!


There are four types of pizza people, as I see it:

The thin crust people: You like your pizza thin and crunchy, just like the Italians.

The in-betweeners: You like your pizza not-too-thin, not-too-thick...why pick one when you can have both?

The thick crust people: You like thick, indulgent pizza that you can sink you teeth into—Chicago-style.

The pizza lovers: You like all kinds of pizza, and would rather die than have to choose one type over another.


This pizza is not for you thin crust people or you in-betweeners. No, no, this pizza is thick-as-can-be and super delicious in a buttery-kind-of-way. This is the kind of pizza that I like.
But then again, for me, flavor is the most important when talking about pizza; that's why I'm a pizza lover. I like pizza that has the best flavor, which just so happens to usually be deep dish pizza. But I can name a ton of other kinds of pizza that I like...just like I found out last summer that true Italian pizza (which is thin crust) is amazing.


When pizza came to the U.S., Americans Americanized it: added tons of toppings, thickened the dough...the list goes on, creating what we now think of as pizza. Now there are more varieties of pizza and more pizza lovers.

One of the much-loved ways that we've Americanized pizza is by creating Chicago-style deep dish pizza, which (obviously) originated in Chicago. This pizza's crust can be up to three inches high (meaning you have to eat it with a fork), and is delicious, buttery, and flaky. The pan is oiled so that the crust fries a little while the pizza is baking in the oven. Since the dough is so thick, deep dish pizza must be baked for a longer amount of time than regular pizza; this means that the toppings could be burnt. So, to solve this problem, the pizza is made in the order: dough, cheese, toppings, sauce.


When I told my siblings that we were supposed to put the sauce on top, they were completely opposed to the idea. I was barely able convince them to let me do it on the smallest pizza, but now I ask, did they really have that much say? They did not help me make the dough!
Half way through the baking time, I put tin foil on the pizzas that were not inverted so that when I pulled them out of the oven, perfectly golden cheese accompanied the delicious aroma.
When I bit into our inverted pizza, I discovered that I liked this strange new way of putting on the toppings! Using a fork, the pizza did not feel that much more messy even with the sauce on top; instead, the sauce prevented it from making me feel like I was getting an overload of cheese, like sometimes happens with pizza—rather, I was getting a nice combination of all the flavors.
All of that butter in the dough really made a difference: the crust was soft and flaky. We didn't oil the pans (we sprayed them with non-stick spray), but I would like to try oiling them next time to see if the crust will fry up a little bit.


I made a double recipe of the dough, and baked it all. We were left with one whole extra pizza (or about 1 1/2 9-inch pizzas, in terms of the recipe). Because the recipe is so well explained on Sally's Baking Addiction, I will not rewrite it here. Just click the link to get the recipe and awesome step-step photos!

http://sallysbakingaddiction.com/2014/12/31/how-to-make-chicago-style-deep-dish-pizza/