Thursday, December 31, 2015

Pai Cookery Class, Thailand

For Christmas break this year, my family visited Thailand. It sounds far away, but when you're already in Taiwan (where my parents and younger sister are currently living), it's actually only a few hours by plane. We split our time between Bangkok (the capitol city), and Koh Samui (an island).

By sampling different foods as we strolled the streets, we discovered that there is a fair amount of Thai food that we like. Since we have also learned that cooking classes and food tours are a lot of fun and a good way to experience a culture (note our Rome food tour and Chicago cooking classes), we decided to do a cooking class here.
We settled on a cooking class taught by a Thai lady, Pai, in Koh Samui. In typical Faber fashion, we embraced the local culture and rode three mopeds to the class.


As we approached, Pai waved at us, the only white people in sight. After cooling down in her dining room, we started cooking. There was a long table with little stations for each of us; we all had our own cutting board, mortar and pestle, and trays of ingredients for the three recipes. We were making stir fried vegetables, pad Thai, and either green or red curry.


First we prepped all of the ingredients. She explained what each one was and how to cut it. There were some interesting ones, like tamarind, tofu, and fish sauce. We cut the carrots into little flowers, unzipped the snow peas (I failed miserably on at least five snow peas before I understood what she meant), and ground a bunch of spices together with a mortar and pestle to make the curry sauce. Pai explained to us the difference between red, green and yellow curry: red curry (the least spicy) uses a large dried red pepper, green uses small fresh red and green peppers, and yellow curry uses  a small dried red pepper as well as some curry powder. I chose red curry and I removed all of the seeds from my chili—my curry was NOT going to burn my tongue off! My red curry turned out to be the least spicy of all of ours, which I was quite content with. Dad chose to make green chili, and it was way too spicy for me!


After prepping, we went out to the porch where there was a little stove and table for each of us. We used woks, sometimes cooking one half of a recipe then shoving that part up onto the side of the wok and cooking the rest of the recipe in the bottom of the wok before mixing it all together. It was certainly efficient! One thing that surprised me about this part was that we added sugar to all of the recipes. It makes the dishes have a sweeter flavor than I am used to in cooking. I really liked this part of the Thai food!


At the end, we sat down with our meal and ate up. I liked everything, but I think my favorite was the stir fried vegetables—the sauce was so good! Everyone had a different favorite, though. Although I wanted to, there was no way I could finish all of my food (except the vegetables, obvi).


As we left Pai gave us each a recipe book, and despite some of the strange ingredients, hopefully I will be able to recreate these dishes at home sometime! But probably not all at once, because the whole class took about two hours...and we didn't even do the preparations ourselves for some of the food, like the chicken. My whole family enjoyed this class, and when I recreate the dishes sometime, I will post the recipes here!

Here is the link to Pai's website: http://paicookerysamui.com

Sunday, December 27, 2015

Buckeyes

These simple chocolate-covered peanut butter balls are a crowd pleaser for sure! Especially in Ohio...


Every year there is one Christmas cookie that we must make: pepparkakor, a.k.a. Swedish gingerbread. They're a tradition, they bring us back to our Swedish roots. Buuuuut this year there were no pepparkakor for us. None. We could find neither dark corn syrup nor cloves—two essential ingredients—in the stores in Taiwan, but since we still needed to make one more Christmas cookie, we decided try a new one.

Enter buckeyes.

We simply excluded the M&M's from the recipe on Sally's Baking Addiction, and the result was traditional buckeyes: creamy sweet peanut butter encased in a shell of rich crunchy chocolate.

(...ours aren't quite as chocolate-covered as they maybe should be to look like buckeye nuts, but we had a bit of chocolate trouble.)


A few notes on the recipe and process.
Use white, milk, semi-sweet, or dark chocolate to cover the buckeyes. Chocolate chips do not melt very well, and are not suggested—however, in a pinch, they do work. Whatever you do, do NOT add milk or water to the melted chocolate to 'loosen it up'. Trust me, it doesn't work. Instead, adding a little vegetable oil (about 1tsp. per 1 cup chocolate) to the chocolate before melting it will help it stay smoother. On the other hand, the chocolate will also take a little longer to firm up. There is no need to temper the chocolate if you are keeping the buckeyes chilled.
Making the peanut butter balls is super easy, but covering them in chocolate takes some time and practice. Use a toothpick or a dipping tool to dunk the buckeyes in the chocolate.
If you used toothpicks, after finishing chocolate-covering all of the balls, use your finger to rub over the tiny holes in the tops until they disappear.


How about a little buckeye background...
Buckeyes are made to look like horse chestnuts, also known as buckeyes. The buckeye tree is Ohio's state tree, and so it comes as no surprise that the buckeye candy is beloved in Ohio. Buckeyes are especially popular in the Christmas and football seasons.

Now, I don't really understand the Christmas part. Sure buckeyes are yummy, but are they Christmasy? Not really. I'm a strong believer in festive desserts at Christmas, especially those including peppermint or old traditions. So, I give you permission to make and eat these buckeyes whenever you want. Where does my authority come from, you may ask? Well, don't ask, just eat.
After all, don't you also think they would make a perfect cold snack on a warm day?


Buckeyes
Makes about 35 1-inch balls

Notes:
*Using chocolate chips for coating is not recommended, but works. A small amount of vegetable oil (about 1 tsp. per 1 cup chocolate) may be added to make the chocolate smoother. Using pure chocolate is best. Semi-sweet, milk, bittersweet, and white chocolate all taste good.

Recipe from: http://sallysbakingaddiction.com/2015/06/22/peanut-butter-mms-truffles/

Thursday, December 24, 2015

Peppermint Mocha Cupcakes

Packed with flavor, you can't go wrong with these festive cupcakes!


I've been missing cupcakes a lot lately. Last year with the cupcake business, I had cupcakes coming out of my ears, but since starting college I haven't been able to make any. Cupcakes are a labor of love in time and ingredients! However, I do have all of my supplies with me, just in case.

Thus, my holiday baking list includes: church windows, buckeyes (coming soon!), and the delicious peppermint mocha cupcakes that I saw on Sally's Baking Addiction. I picked a morning, and whipped these cupcakes up. It actually took a really long time because I knew where nothing was in my mom's new kitchen... But a few hours and two sore feet later I had a nice row of fresh cupcakes with pretty swirls of pink and white frosting. Well, some swirls were pretty—it was my first time doing two-toned frosting.


The frosting was actually some of the best I have tasted. I don't know if it was the use of cream instead of milk, the type of butter I used (salted cream), or what, but it was SO good! I may have licked my frosting spatulas clean ;)

Peppermint Mocha Cupcakes
Makes 12 cupcakes

Notes:
*Use instant coffee, not coffee granules.
*It is alright to use cake flour instead of all-purpose flour. Cake flour will make the cupcakes slightly softer.
*Buttermilk is essential. If you do not have real buttermilk, you can make a substitute:  mix 2 teaspoons white vinegar or lemon juice with 1/2 cup milk. Let sit for 5 minutes to curdle.
*Instead of heavy cream, milk or half-and-half can be used, but the frosting will not be as creamy.
*Immediately before serving, sprinkle on crushed candy canes; if done too far in advance, they will melt.
*To learn how to make swirled frosting: http://sallysbakingaddiction.com/how-to-make-swirled-frosting/

Recipe from: http://sallysbakingaddiction.com/2013/11/24/peppermint-mocha-cupcakes/

Sunday, December 20, 2015

Church Windows

"It's beginning to look a lot like Christmas..."


Wait...no it's not. I'm visiting my family in Taiwan right now, where it's 70ºF and Christmas isn't really celebrated, except for a few lights. However, inside our apartment, Christmas season is in full swing: tree, presents, decorations, music, movies, and, of course, baking.

First up on the baking list was church windows, my sisters' favorite Christmas cookie. Their namesake, stained glass windows, are one of my favorite parts of visiting big old churches. Those and the pipe organs. Unfortunately, these cookies are just about the only church windows I'll find in Taiwan. There are plenty of temples here (quite cool to see, but also a little creepy), and there are a few modern churches, but it's nothing compared to Europe. But these cookies appear on our Christmas cookie plate every year almost without fail.

However, sometimes getting these cookies onto the cookie plate is a bit of a struggle. To get the stained glass design, you need mini colorful marshmallows. Not a big deal, except that they are difficult to get ahold of overseas. Hence, we have to have visitors send them at Christmas, or we resort to cutting up large marshmallows into smaller pieces.

This year, the cutting-up method did not go very well. Elena and I dumped the marshmallow pieces into the very hot chocolate mixture, started to stir, and stood there in shock as we realized that the marshmallows were melting, ruining the church window effect. After panicking for a minute, we quickly rushed the pot over to the freezer and stuffed it in before any more marshmallows could melt. Luckily we saved them just in time, and we ended up with rich, delicious, marshmallow-stained glass church windows. Lesson learned!


This recipe from my grandma Faber is simple, quick, cute, and oh-so-tasty. Even the cat was curious to see what all the fuss was about!

Church Windows

Ingredients:
12 oz. chocolate chips
1/2 cup butter
1 pkg. colored mini marshmallows*
1 cup chopped nuts, such as walnuts (optional)

Directions:
In a medium pot, melt the chocolate chips and butter together.
Let cool for about 3 minutes before stirring in the marshmallows and nuts so that the marshmallows don't melt.
Pour the mixture onto two sheets of plastic wrap in a log shape. Roll the plastic wrap around the logs, set on a cookie sheet, and chill in the refrigerator. Cut into 1/2 inch slices.

*If you do not have mini marshmallows, cut colorful large marshmallows into small pieces, about 1 cm in length and width.

Recipe from: Janet Faber

Saturday, November 28, 2015

Rainbow Ribbon Jello

This year for me was the first in four years of being in the States for Thanksgiving. It feels normal because it’s what I’ve done the majority of my life.
But.
But, it still feels weird because I’m not with my parents and sister. I’m missing them for sure, but I’m thankful that I still have family near enough to be with this Thanksgiving.

Overseas, we often have Thanksgiving dinner with a large group of friends and we all contribute our favorite dishes. Here we have it at my grandparents’ house with our huge family.


One thing that I’ve always felt was missing when we had Thanksgiving away from home was Grandma's rainbow jello, which she always serves at Thanksgiving. When I was younger, this was the dish all the kids waited for. (Now, besides dessert, it’s sweet potatoes for me. Sorry jello.) It’s colorful, jiggly, you can eat with your fingers…what’s not to like? Overseas, I was not able to have it, but now that I’m back in Michigan I actually get to learn to make it! It definitely has a lot more steps than I expected, but it’s still really simple.


Rainbow Ribbon Jello

Ingredients:
7 - 3 oz. packages gelatin
1 12 oz. can evaporated milk
Boiling water

Directions:
Layer 1: Black cherry jello and 1 1/2 cups boiling water.
Layer 2: Cherry jello, 1 cup boiling water, and 1/2 cup evaporated milk.
Layer 3: Lime jello and 1 1/2 cups boiling water.
Layer 4: Lemon, 1 cup boiling water, and 1/2 cup evaporated milk.
Layer 5: Orange jello and 1 1/2 cups boiling water.
Layer 6: Pineapple or apricot jello, 1 cup boiling water, and 1/2 cup evaporated milk.
Layer 7: Strawberry jello and 1 1/2 cups boiling water.

For layers containing only 1 packet of jello and 1 1/2 cups boiling water:
-Dissolve jello packet in boiling water. Let cool until lukewarm (except for the first layer). Pour into 9”x13” pan.

For layers containing 1 packet of jello, 1 cup boiling water, and 3/4 cup evaporated milk:
-Dissolve jello packet in boiling water. Let cool until lukewarm, then mix in evaporated milk. Pour into pan.

Pouring:
-If you are pouring a new layer onto an existing layer, make sure that the existing layer is completely cool and solidified before adding a new layer. Pour gently so that the new mixture does not rupture existing layer. Pop any large bubbles.

Setting:
-Set in a cool place for about 1 hour, until cool and solidified. It is important that the surface which the pan sits on is level, or you will have tilt-y jello.


Recipe from: Lois Nelson, Vancouver, Washington (Seven Layer Rainbow Molded Salad), Magazine

Sunday, October 25, 2015

Cream of Wheat and Cocoa Wheat

I'm the kind of person that likes to have a variety of breakfast options—it is my favorite (and the most important) meal of the day, after all.

Now that I'm at college and on the meal plan, I'm happy to say that there's usually quite a variety at breakfast, from bagels to omelets to cereal to waffles. A few times a week oatmeal, cream of wheat, pancakes, or cinnamon rolls will show up too.

One day I decided to try the cream of wheat. Well, at least it looked like cream of wheat. I'm not sure what it actually was because it tasted terrible! Maybe it needed more brown sugar? Either way, it made me miss real, good cream of wheat.

I've been eating cream of wheat and cocoa wheat for years. I remember when I used to wake up in the morning to my mom pouring thick, warm, chocolatey yumminess into a bowl...who doesn't want chocolate for breakfast? And while I loved cocoa wheat, I was slightly less excited when she made cream of wheat because I didn't think that she ever put enough brown sugar on top. But I've gone past that now—give me either and I'll be happy! *Ahem* But not from the cafeteria...


In Russia I discovered that I could easily make either variation for breakfast (I tried not to overload on the cocoa wheat). I'm not really sure why it took me so many years to make it myself instead of waiting for the days when my mom to decided to make it.

In fact, we started eating so much cocoa/cream of wheat in Russia that we became cocoa/cream of wheat pros:
-We discovered the cheaper Russian version of cream of wheat at the grocery store (well, ok, my mom gets all the credit for that one).
-We kept said Russian cream of wheat in its own special little Polish pottery canister.
-We discovered a way to make both kinds using only the powder for the cream of wheat.

Also, you know those chewy little balls that you sometimes get in cream of wheat? Yeah, well my mom raves about those—to those of you who have no idea what I’m talking about, just wait until you try them—they sound strange at first, but they’re actually pretty good.
Well, I discovered how to get those elusive, chewy little pieces every time. You're welcome.

So, first off, for both cream of wheat and cocoa wheat, heat 1 1/4 cups milk in a small pot.


And while it's getting warm, measure out three tablespoons of cream of wheat.


If you want the chewy pieces, wait until the milk is quite hot before pouring in the cream of wheat. Pour in the cream of wheat, let it sit for a second, then mix it up a little. Only stir occasionally. You want the heat of the milk to make the cream of wheat granules stick to each other; stirring too much will separate them.
You can also add a pinch of salt before adding the cream of wheat to give it a bit more flavor.
If you don't care about getting the chewy pieces, just wait until the milk is quite warm, then pour in your cream of wheat. Stir as much as you want!


After about 3-5 minutes, your cream of wheat should be thickened up. Pour it in a bowl, and let it cool for a minute while you do the dishes.


Top with brown sugar...


...stir it up, and enjoy!

Ok, now for cocoa wheat, using the cream of wheat powder.
Again, heat 1 1/4 cups of milk. Measure out 3 tablespoons of cream of wheat again, but don't add it yet.


Add sugar to your milk; I usually do 2-3 teaspoons.


Next add some cocoa powder; I like one heaping teaspoon. Stir both the cocoa powder and sugar in. You can also add a pinch of salt, if desired.


When the milk is hot, add your cream of wheat. Again, don't stir too much if you want chewy pieces!


There they are! Now you know I'm not making the chewy pieces up. After about 3 minutes, turn the heat off and let the cocoa wheat sit and thicken up for about 2 minutes. Cocoa wheat has to cool more than cream of wheat before getting thick.


Now pour it in the bowl, and let it cool a little more. The longer it sits, the thicker it gets!


Cream of Wheat
Serves: 1

Ingredients:
1 1/4 cup milk*
1/8 tsp. salt (optional)
3 Tbs. cream of wheat
brown sugar, for topping

Directions:
In a small pot over medium-low heat, heat milk and salt (if using) until just hot, with bubbles at the edges; do not scald.
Once hot, add cream of wheat. Stir occasionally and heat until thickened, about 3-4 minutes.
Remove from heat and pour in bowl. Sprinkle with brown sugar.

*For chewy pieces:
Make sure that the milk is quite hot before adding cream of wheat. When adding cream of wheat, pour all three tablespoons in the same general area of the pot. Wait about 30 seconds before stirring. Do not stir too much, or there will be no chance for the balls to form.

*For a more creamy consistency, replace 1/4 cup of the milk with 1/4 cup of cream.

Cocoa Wheat
Serves: 1

Ingredients:
1 1/4 cup milk*
2-3 tsp. sugar
1 to 1 1/2 tsp. cocoa powder
1/8 tsp. salt (optional)
3 Tbs. cream of wheat

Directions:
In a small pot over medium-low heat, heat milk, sugar, cocoa powder, and salt (if using) until just hot, with bubbles at the edges; do not scald.
Once hot, add cream of wheat. Heat for about 3-4 more minutes, until slightly thicker, stirring occasionally.
Remove from heat and pour in bowl; let sit for 2 minutes to thicken and cool before serving.

*For chewy pieces:
Make sure that the milk is quite hot before adding cream of wheat. When adding cream of wheat, pour all three tablespoons in the same general area of the pot. Wait about 30 seconds before stirring. Do not stir too much, or there will be no chance for the balls to form.

*For a more creamy consistency, replace 1/4 cup of the milk with 1/4 cup of cream.

Sunday, September 6, 2015

Making Apple Cider

I've been at college for three weeks now. So far, I'm enjoying it. There's plenty of homework, but also plenty of fun activities. I'm really liking my classes too, which is good (well, most of them—I'm still trying to convince myself that I like speech class).


This weekend I am getting away from campus and am in Michigan at my roommate’s house for labor day. Even though I’m not in a foreign country, I’m still having new experiences. This weekend they were food-related (the best kind)!

I made apple cider! I feel like a pro, even though I only helped for a few hours, and I mostly just put the apples in the top of the apple grinder. What’s the apple grinder? Don’t worry, I’ll explain the whole process.

What’s the first thing you have to do when making apple cider? Pick the apples, duh! I didn’t help with this part, but the Smiths have quite a few apple trees on their property that they picked the apples from.


Next, they rinsed them off in some water. No unnecessary dirt in my cider, please!


Then the apples had to be cut into quarters so that they would fit in the masher. If the apples are a little bruised or mottled, no worries! They will still taste good when made into juice. Just throw out the rotten ones—yuck!


The apples then have to be ground into chunks so that they can be easily squished. One person put quartered apples into the top of this machine while another turned a helm-ish looking wheel. The ground apples came out the bottom, and every so often someone had to scrape them down into the bowl.


After being ground, the apples can finally go into the press, a contraption that squishes the apples between wooden blocks; a piece of mesh strains the juice from the squished apples. The juice comes out a tap at the bottom, and flows through a funnel into a bottle.


And that’s it! It takes quite a few people working on this to get it done efficiently. At least four to work at a good pace, but more is always better to trade off when muscles get tired.

We, of course, were doing this all by hand, but most farms will use machines.

Joanna and I got a jug to take back to Bethel as a reward for helping! Apparently apple cider is really good with ginger snaps...

Later that night, I was wondering what the difference between apple cider and apple juice is. Well, it turns out it’s not a straightforward answer. Here are three ways that companies may base labelling on:
1) Apple cider is less processed and less strained than apple juice.
2) Apple cider is made with apples picked early in the season.
3) For some companies, only the label is the difference between the two.

At the end of the day, we sat down together with friends and had an amazing meal of venison burgers and homegrown sweet corn. The Smiths shot the deer and ground the meat themselves for the venison burgers; it was so good that if I had had room, I would have eaten a second! The Smiths also grew the sweet corn in their garden—how awesome is that?! Along with this meal, we had our freshly made apple cider. So much homemade food. It just doesn’t get much better.

If you want to learn how to make your own apple cider, this is a great resource to ensure the safety of the final product.
If you want to make easy, flavorful (but not completely traditional) apple cider, this looks like a great recipe.


Sources: http://www.thekitchn.com/whats-the-difference-between-apple-cider-apple-juice-word-of-mouth-178470

Saturday, August 8, 2015

Basic Banana Bread

Basic Banana Bread

Why are there stretches of days when you’re really productive, then all of a sudden you don’t want to do a thing?


Like for example, I just arrived at my grandparents’ earlier this week; since arriving, I've gotten up in the mornings and ran, I baked this banana bread, I played my flute and piano, I sorted my college stuff...and the list goes on. That lasted all of 3 days before today came and I just felt like doing nothing. Maybe it's the sudden overcast weather? Yeah, let's blame it on that. After all, who wants to run in the rain?

Well, now it's 5:30 (pm!) and I've finally gotten myself motivated enough to write about banana bread instead of just eating it. <-- Not that that’s a bad thing, because it’s pretty tasty.

This is a really good basic banana bread. It’s fairly plain in terms of extra flavors added, which means it’s easy to dress up. Add a little cinnamon, some chocolate chips, some nuts…go for it, experiment!


However, this bread does already have one little secret. A very simple change that is subtle, but definitely makes a difference. A sugared pan. You know how you usually grease and flour a pan to prevent sticking? Well, same idea, except use sugar instead of flour. This gives the edges a delicate sweetness that makes them oh-so-good. No more avoiding the edges! However, you must use butter or Crisco when greasing the pan and not cooking spray. If you want to spray the pans, fine. But just don’t use sugar. It won’t work.


Now to try to salvage the rest of my day!

Basic Banana Bread

Notes:
I made 1 1/2 recipes of this bread, hence the extra, smaller loaf in the picture. If you make the recipe as above, you should only get one loaf.
You can also make this bread into 18-24 muffins, two 8x4" loaves, or three mini loaves; baking times will be affected.

Recipe from: http://www.crazyforcrust.com/2014/02/moms-banana-bread/


Thursday, July 30, 2015

Tortilla Soup

This soup is super easy. Like throw-it-together-in-5-minutes easy. And yet, I still managed to have an accident while making it the other day.


I'm not even really sure how it happened. One minute I was happily cutting up frozen chicken, the next, I was watching the measuring cup of chicken fall off the counter, almost in slow motion. My hand must have bumped it, and there was nothing I could do to stop it. It was on the floor. And then, as if to rub it in, my friend's cat came while I stood there staring at it, and my friend snapped a picture. Whoops. Into the trash that half cup of chicken went.


My family introduced our friends to tortilla soup last time we stayed at their house (several months ago), and they loved it so much that this time I'm here, we just had to make it again. It was a gooooood idea. My stomach thanks me. Unfortunately, that also meant I had witnesses to the chicken episode, but what's life without chicken flying everywhere?

When we were making this soup, Hannah and I were on a roll. So, after throwing together the ingredients for tortilla soup, we also whipped up some cornbread and mashed some avocados for guacamole. Oh, and made a cheesecake. Just sayin'. Then after smelling the soup cook for a few hours, of course I ate waaaay too much of it at dinner; I just couldn't resist.


I would consider tortilla soup Tex Mex since it has both American and Mexican influences—but call it what you want. What really matters is that it's easy, it's warm, it's soupy, it's cheesy, you can scoop it up on tortilla chips and eat it (that's the best way, the only way), you can add sour cream or hot sauce to your bowl (not to mine, though). Tortilla soup is a definite favorite in my family; it's much requested, all year round.


Slow Cooker or Stove Top Tortilla Soup
Feeds 5-6

15 oz. can black beans, rinsed and drained
1 1/2 cups frozen corn
3/4 cup chunky salsa
14 oz. can chicken broth
1/4 cup water
3/4 cup boneless skinless cooked chicken, cubed
16 oz. can refried beans
2 cups shredded cheese (such as cheddar or colby jack)
1 bag tortilla chips

1. In a large saucepan or a crock pot, combine all ingredients except cheese and chips.
2. Heat on stove until heated through, or in a slow cooker for 3-4 hours.
3. Add half of cheese. Stir until melted.
4. Serve soup in bowls, and top with shredded cheese, tortilla chips, sour cream, and hot sauce.


Instant Pot Tortilla Soup

15 oz. can black beans, rinsed and drained
1 1/2 cups frozen corn
3/4 cup chunky salsa
14 oz. can chicken broth
1/4 cup water
3/4 cup boneless skinless cooked chicken, cubed
16 oz. can refried beans
2 cups shredded cheese (such as cheddar or colby jack)
1 bag tortilla chips

1. Pour black beans, corn, salsa, chicken broth, water, and chicken into the Instant Pot. Give it a quick stir.
2. Put lid on Instant Pot and manual cook for 10 minutes. Make sure the valve is set to “sealing.” When the timer beeps, release the pressure release for 10 minutes and then move the valve to “venting.”
3. Remove the lid and take out the chicken. Shred it on a cutting board then add it back into the Instant Pot.
4. Pour in the can of refried beans and 1 cup of the cheese, stirring until the soup is creamy and smooth. If necessary, use sauté mode to help melt the cheese.
5. Ladle the soup into bowls, and top with shredded cheese, tortilla chips, sour cream, and hot sauce.

Monday, July 27, 2015

Chicago Food Trip

Last weekend we took a father-daughter trip to Chicago to do cooking classes. Not only was it unique, but it was tons of fun! Here's an overview of what we did.

Day 1: Bread Making
http://mykitchenclatter.com/classes/

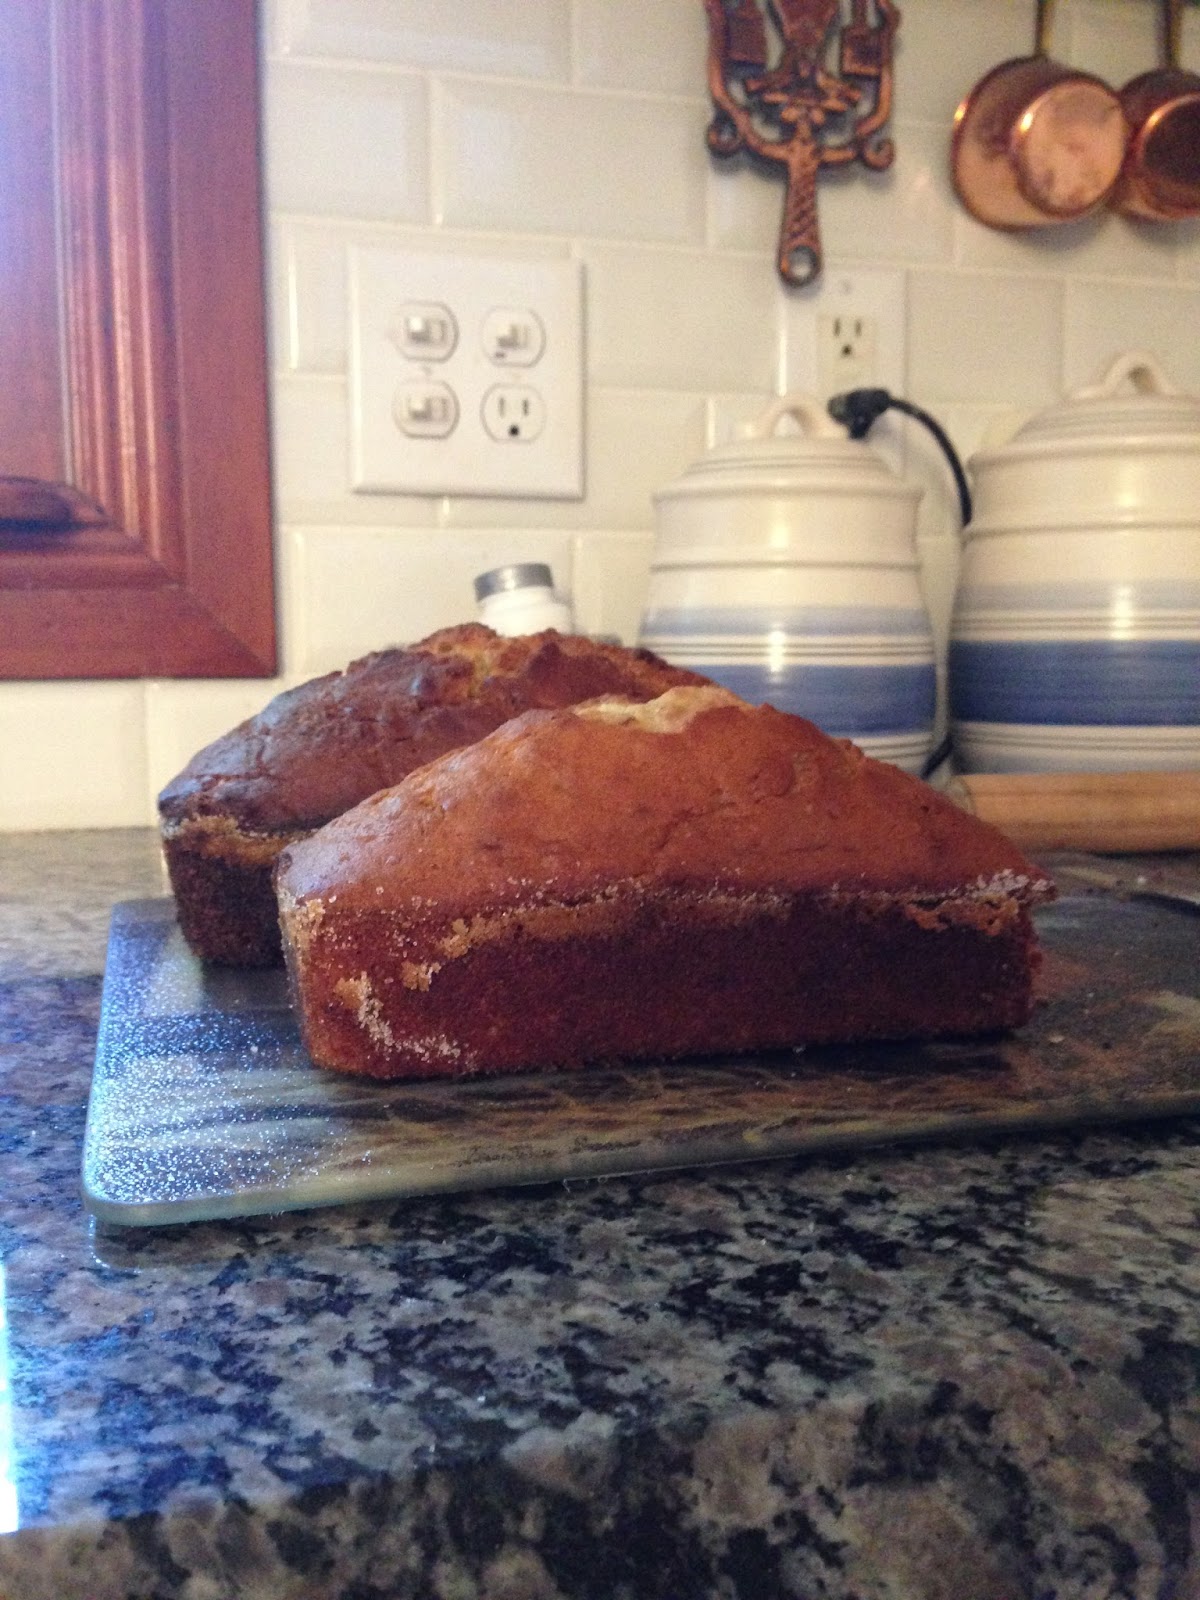
We drove right from Grand Rapids to the first class, which was about 1 1/2 hours outside of Chicago. It was a private bread making class at a lady's house. She had a big, beautiful kitchen and obviously knew what she was doing. Since the breads that we made revolved around the flour that she milled herself, first thing she did was show us how to pour wheat berries into the top of her flour mill, and to make a multipurpose bread out of the flour that was produced. It only took a few minutes to mill all the flour that we needed for the recipe.
After mixing up the simple dough, we split it into portions. The first portion we rolled into tight loaves of bread, which we let rise and later baked. When the bread came out of the oven, we spread butter, honey, and/or jam on it—yum! We were given a loaf of this to take home.
The second portion we made into a pizza; we put olive oil, goat cheese, fresh basil, tomatoes, and sausage on it. I had never had goat cheese before, but I was pleasantly surprised at how good it tasted on this pizza!
The last portion of dough she rolled flat, then brushed plenty of melted butter on top, and sprinkled with a thick layer of brown sugar and cinnamon. Warm out of the oven and slightly under-baked, they were some of the best cinnamon rolls I’ve eaten. She gave us some extras to take to the hotel for breakfast the next morning. We kept them in the fridge and ate them cold the next morning; normally, this isn’t the best way to eat cinnamon rolls, but these rolls were still amazing, even cold. We were all hunched over on the floor, gobbling down our cold, sugary cinnamon rolls.
At the end she ground some more flour up for Julia to take home and experiment with—I regret not also asking for some!
The lady gave us a lot of good information and useful tips for making homemade flour—what type of wheat berries to buy, what mixers to buy, how to use it…so much information that I can’t remember it all! However, now I know that making homemade flour is easy and tastes amazing. I was impressed that she made the pizza, cinnamon rolls, and bread all from the same dough, and all tasted fantastic.

A few things I learned from this class:

-dough made from homemade whole wheat flour is more difficult to mix (you need to use a stand mixer), but almost impossible to over-knead
-you must knead dough until it can stretch thin, but not have holes in it
-with homemade whole wheat flour, the dough rises faster, and only one rise is necessary
-use olive oil to make counters non-stick so that extra flour isn’t kneaded into the dough
-use more narrow pans for baking bread so that the bread is able to climb the sides, aiding rising
-wait at least 3 hours to cut fresh baked bread so that it won’t lose moisture and become dried out
-kitchen aids are much worse quality now because they changed brands; however, there are other options out there
-milling your own flour is almost the same cost as buying it (but the machine is expensive)
-wheat flour has a very short shelf life
-for good homemade wheat flour, you must buy reliable seed and let sit for a few days to see if there are bugs in it


Day 2: The Wooden Spoon
http://woodenspoonchicago.com/cooking-classes.html?month=6&year=2015

This class took place in a cooking store called The Wooden Spoon. We were in a group of 12 students; there was one chef to teach us, and one guy to do the dishes. We were preparing 5 dishes in all (smoked trout salad, grilled herb marinated hanger steak, pan roasted green beans with almonds, creamy risotto with asiago, and molten chocolate cake with peanut butter filling), so we split into groups of 2 or 3 and each group prepared the ingredients for one of the dishes. Julia, Elena, and I were the risotto crew.
After all of the ingredients were prepared, we started cooking the food. One person read the instructions, the other carried them out, and everyone else watched. The chef tried to get people to cook a dish that they did not prepare. However, somehow I ended up doing risotto again--but later I also got to help with the smoked trout salad a little.
After everything was finished cooking, we all sat down and ate together. The food was delicious! My favorite was the smoked trout on the salad and the molten chocolate cake (surprised?). We were given the recipes to take home, and I know I will be making that cake again!

Some things I learned from this class:

-how to hold a whisk: hold your elbow in, put your hand on top of the whisk, and make circular motions towards yourself
-blanch green beans with salt water in order to get the beans more perfectly cooked and to help them retain a bright green color
-grease cupcake pans for molten chocolate cakes with melted butter, then dust them with a mixture of flour and cocoa powder so that the cakes do not have white outsides when they are removed from the pans
-to sprinkle salt or pepper on something: pinch some in your fingers, then hold your hand high over the dish and rub your fingers together, moving your hand so that the salt/pepper is evenly distributed


Steve’s Segway Tour
http://www.stevessegwaytours.com/Pages/default.aspx

Later, after the cooking class at The Wooden Spoon, we went on a segway tour! It was a very last minute decision to join the tour, but the owner was accommodating to us.
Before the tour we got a lessen in how to ride the segways: basically, lean forward to go forward, lean backwards to stop or go backwards
. Except, it was a bit harder than this in reality—at first I struggled with smoothly transitioning from forwards to backwards, but by the end of the lessen I was doing pretty well.
Our tour guide was very friendly, and she was knowledgable about the city. She made the tour very enjoyable. We got lots of information about Chicago in general, its history, and specific buildings.
Overall, it was a very fun way to learn a lot about Chicago and see new things. Also, by the end of the tour I felt like a pro on the segway—even though Elena was the speed demon, not me. Luckily I was never a “segway star”, when you fall off your segway and catch yourself by throwing up your arms like a star. Overall, the tour was a little expensive, but totally worth it.


Day 3: Give Me Some Sugar
https://givesugar.com/parties/private-instruction-2

This was a private class located a little outside of Chicago. They do many other baking classes here as well.
We each had a small chocolate cake that they had made for us and had cut properly. The owner of the shop demonstrated with her own cake how to do the cutting that they had already done for us (you get to do it yourself in the cake decorating 2 class). Afterwards, she showed us how to crumb coat our cakes…which I found a lot harder than she made it look. The cakes were then put in the fridge to set while we practiced different frosting techniques.
She showed us how to use a star tip and a round tip, and the different things we could do with each of them. We practiced the techniques over and over again on parchment paper. I found writing to be the most difficult to make look good—it's much different from normal writing! I liked making little flowers with the star tips best—as you can see from the way I decorated my cake!
When we got our cakes back, she demonstrated how to frost the cakes, which we then tried ourselves (remember: the enemy of good is better. This applies 100% here!). After finally accepting that any more fiddling with the frosting would make my cake look worse not better, I decorated my cake. I chose a simple design, because I know from experience that if I try anything too fancy, it will not look good!
I brought my cake to my friend’s house and we devoured it within a few days. Yuuum.

Things I learned:

-use a serrated knife to cut cake
-a turntable is essential (at least, if you’re serious about cake decorating)
-a crumb coat is a thin layer of frosting that seals in the crumbs; you must let it set in the fridge for at least 30 minutes, but preferably overnight before frosting and decorating it
-we used Italian buttercream to frost our cakes; it is made out of whipped egg whites, sugar water, and butter—lots of butter! I do not like it as much as American buttercream because it is so buttery and has little flavor (unless you add flavoring, like mint extract, in which case it’s great!)
-to hold a pastry bag: twist and hold the top closed with your right hand and squeeze down on the frosting; hold your right wrist with your left hand to steady and direct your right hand
-when writing on a cake you can use a toothpick to trace your words into the frosting first


Day 4: Bobby’s Bike Hike food tour
http://www.bobbysbikehike.com/default.aspx

This day we had no cooking classes planned, so Elena and I planned a surprise for my dad. We knew we wanted to do something with bikes, since he loves biking. After doing some looking, we decided on a bike-food tour because 1) who doesn’t like food? and 2) we loved our food tour in Italy. Plus, it was a bonus that it kept with the food theme of our trip.
Bobby’s Bike Hike was near our hotel, and easy to find. We were fitted with helmets and bi
kes (which all had names, haha—mine was Julius). Our guide was super friendly and knew a lot about Chicago and the food.
The first place we biked to was Gino’s deep dish pizza. Apparently they are still using the same recipe as they originally used 100 years ago when they started. It was an interesting restaurant because every possible surface was covered in writing, sometimes layers of writing so thick that you couldn’t decipher anything (ironically there was a sign outside the restaurant asking people not to write on the walls). The pizza was really good; it had a nice crispy crust and lots of thick cheese.
Next we biked to Swirl’s cupcakes. Swirl’s was one of the first cupcake bakeries in Chicago, and it opened right at the start of the cupcake craze…so at 9 years old, they are ancient in the cupcake world. Everyday the cupcakes are made fresh, meaning someone has to wake up at 12:30 in the morning to make the delicious cupcakes. Each cupcake is decorated beautifully with a lot of thought to the flavors; the cake is moist and topped with a tall swirl of Italian buttercream (the same thing we used to decorate our cakes, except this was flavored so I liked it better). There are flavors of the day and also gluten-free/vegan cupcakes. I got a mint chocolate chip cupcake which was so scrumptious (why doesn’t anyone use that word anymore? It’s awesome); it had a chocolate filling and a chocolate mint cookie buried under a tall piled of chocolate-covered mint frosting.
After cupcakes we rode over to have some hot dogs at Murphy’s Red Hots. They ensconce grilled Vienna beef in soft steamed poppyseed buns. You can get your dog “Chicago style” with everything on it, but Elena and I opted to get a plain one. Upon telling the man at the counter this, he was surprised and asked “you aren’t going to order ketchup on it, are you?”. We assured him that we were not! Our guide had told us before entering the store that if you order ketchup on your dog, you may be sent to the back of the line to try ordering again. This is because ketchup was originally made to cover up the taste of bad meat; thus, if you order ketchup on your hot dog, it is insulting because it is saying that their hot dogs taste bad. So, Elena had to sneak some of the french fry ketchup on her hot dog after we found a table.
Lastly, we biked to a bar by Wrigley Field. I got root beer, which was really good. We went up to the roof of the bar where bleachers were located, facing out over Wrigley Field, which was cool.
We took the lakefront trail back to Bobby’s Bike Hike, stopping once on the way to jump in the sparkling blue lake.

This trip was fantastic, and I highly suggest doing something like this for anyone who likes to mess around with food! I would recommend any of the places that we went for classes, since they were all great; all of them have other options for classes too.