Monday, July 13, 2015

Hobo Pies

I had the best of intentions to catch up on blogging this summer, but I've been busy enjoying my newfound free time in other ways. So, while I have baked, I haven't gotten to the blogging part yet. Until now, that is.

This is one of my favorite summer recipes: hobo pies. Every year I look forward to camping—the time that we usually make hobo pies—so that I can eat my fill. It's been two years since I went camping and I'm not going this year, so I was delighted when my aunt suggested making them in their fire pit.


In case you aren’t familiar with hobo pies, I’ll explain.

Hobo pies are grilled cheese sandwiches parading as campfire food. They are made in a hobo pie maker, which consists of two bread-shaped pieces of iron with long handles. Buttered bread and some choice toppings go inside the iron part. The hobo pie maker is put in the fire until the hobo pie is crispy on the outside, hot and melty on the inside.
Everyone looks forward to hobo pie night when we’re camping! We usually do pizza hobo pies for dinner, and blueberry marshmallow hobo pies for dessert. However, the filling choices are practically endless.


Neither I nor google is exactly sure where the name "hobo pies" came from (hobos sitting around a campfire making a simple dinner?), so, without further ado, here is the recipe.

Pizza Hobo Pies

Ingredients:
Sandwich Bread
Butter, for spreading on bread
Pizza sauce
Mozzarella Cheese
Pizza toppings (ham, pineapple, pepperoni, ground sausage, onions, peppers, etc.)

Directions:
1. Spread butter on two pieces of bread. Put bread in hobo pie makers, buttered side facing the iron.
2. Spread sauce on one or both pieces of bread. Sprinkle mozzarella cheese on one of the pieces of bread. Put desired toppings on top of the cheese.
3. Put the hobo pie maker back together—it works best if the iron with the piece of bread without toppings is tipped over onto the iron holding the bread with toppings.
4. Put hobo pie maker into the coals of a bonfire; after about 3 minutes (depending on how hot the coals are), check the piece of bread facing the coals, and check about every minute after that until the bread is golden brown. Once golden brown, turn the hobo pie maker over so that the other piece of bread is facing down.
5. Remove from fire when both pieces of bread are golden brown. Be careful with the hobo pie maker when dumping out the hobo pie; it will be extremely hot. Be sure to place the hobo pie maker where it won't melt anything or burn someone. Wait 1-2 minutes when it is cooler to eat the hobo pie.

Dessert Hobo Pies

Ingredients:
1 can of pie filling (blueberry, cherry, etc.)
Marshmallows or marshmallow fluff

Directions:
1. Spread butter on two pieces of bread. Put bread in hobo pie makers, butter side facing the iron.
2. Spread pie filling on one or both pieces of bread. Spread marshmallows or marshmallow fluff on the pie filling (marshmallows work better if they are torn up).
3. Put the hobo pie maker back together and proceed the same way you would make pizza hobo pies.

This process can be replicated with any fillings, such as ham and cheese.

Wednesday, May 20, 2015

Soft and Chewy Chocolate Cookies

We need to celebrate, because I JUST FINISHED MY IB EXAMS!

Sorry for shouting, but it really is very exciting. Two years of work, then 14 exams—it was no walk in the park. And now all that’s left to do is celebrate!

And these cookies are totally celebration-worthy. They’re soft and chewy, and chocolatey enough to satisfy even me.


I loooove these cookies. Let me tell you why!

The aroma floating out of the oven when they are baking is mouthwatering. I could hardly wait five minutes for them to cool enough not to burn all of my taste buds off, but finally I was able to bite into one of these cookies. Warm, gooey, chocolatey—it was better than I imagined it could be. Words cannot describe these cookies. Why did it take me so long to make chocolate cookies?

These are truly the perfect chocolate cookie. You can switch out the caramel-filled chocolate chips for peanut butter chips, mint chips, oreos…you name it. They’re even good enough that you could eat them plain. Once baked, they stay soft for daaaays. Also, you can freeze both the unbaked cookie dough balls and the baked cookies, which means you can satisfy your cookie cravings any time at a moment’s notice!


However, you must make them right, or you won’t have the perfect cookies.

Use room temperature butter and (if you can) eggs. They combine more smoothly with the other ingredients so that everything mixes together into one nice, consistently chocolatey dough.
Chill the dough. If you skip this step, the dough will be too sticky to handle and the cookies won’t be as thick (sad face).
When you remove the cookies from the oven, they’re going to look under-baked. I know. Just let them cool on the cookie sheet for 5 minutes to finish baking, then transfer them to a wire rack to finish cooling. On the other hand, if you leave them too long on the cookie sheet, they might start to get hard and crispy—which is ok if that is what you like.


These rows of cookies are unconventional—we're living on the edge today.


5 minutes on the pan, then stuff as many cookies as you like into your mouth. Your taste buds deserve to be able to taste these cookies at their best.


Let the rest finish cooling for later!


Aaaaand serve. Sorry about the feet—it's spring in Moscow.

Soft and Chewy Chocolate Cookies
Prep: 15 minutes, Chill: 2 hours, Bake: 12 minutes
Total: 2.5 hours
Yield: 16 large or 36 small

Recipe from: http://sallysbakingaddiction.com/2013/04/21/inside-out-chocolate-chip-cookies/

Thursday, April 30, 2015

Tiny Strawberry Cream Scones

Truth:

Calories do not exist if you eat when no one is looking.

That is the reason that three strawberry cream scones disappeared into my stomach as soon as they came out of the oven (I also ate strawberry shortcake right before that...FOR DINNER).

In my defense, yesterday was my last day of high school (!), which I personally believe is worthy of celebration (in my world that means eating as much delicious food as I can). I still have to survive three weeks of IB exams, but after I graduate I get to repeat with the celebrations. Yay!


These scones are really cute with little strawberry pieces sticking out of their golden-brown tops, but there's much more to them than just looks. They're quick and easy to mix up, smell heavenly while baking, are soft, tender, and moist beyond belief, and taste amazing.

In addition to strawberries, there's also white chocolate chips in these, but they're optional. Okay, let's be realistic, they're totally not optional! They compliment the strawberries and cream so well that I know I'll be adding them every time.


Celebrate spring with these scones (it's finally coming to Moscow)! Eat them for breakfast, eat them for snack, eat them for dessert...find any excuse you can to make them. They're that good.

Tiny Strawberry Cream Scones
Makes: 20-24 small scones

Recipe from: http://joythebaker.com/2014/04/tiny-strawberry-cream-scones/
Originally adapted from: http://www.kingarthurflour.com/recipes/cream-tea-scones-recipe

Thursday, April 16, 2015

Russian Hot Chocolate

To say "I love chocolate" would be an understatement. But get this—I didn't have my first sip of hot chocolate until I had traipsed this earth for 16 years.

And guess what? Chances are, you haven't had real hot chocolate at all. Now you're probably really confused, but let me clarify. Many people do not realize this, but there is a difference between hot chocolate and hot cocoa.

Hot cocoa is what we usually think of when we hear the words "hot chocolate". It is made with cocoa powder (hence the name hot cocoa) and sugar mixed with hot milk or water. It is more or less the consistency of milk—think hot, chocolate milk.

Hot chocolate, on the other hand, is much thicker and creamier than hot cocoa. As its name implies, it is made by melting chocolate into milk and cream. Because hot chocolate is rich, creamy, and thick beyond belief, it is wise to have a glass of water nearby. Hot chocolate has a much higher fat content than hot cocoa because it usually contains more dairy, and it is made using chocolate rather than cocoa powder. Hot chocolate is a popular drink in Russia and France.


The first time that I had real hot chocolate was at Shokoladnitsa, a Russian cafe chain that is very popular here in Russia. Because their hot chocolate is so intense, you can order just a teeny-tiny cup of it; but there are also bigger sizes of chocolatey bliss for more serious chocolate lovers (i.e. me!). No matter the size, though, it always comes with a glass of cold water, otherwise people would constantly ask for some.

It took awhile, but I've come to realize that in Russia, when you ask for hot chocolate, that is what you get. It is a big surprise for some foreigners when they see hot chocolate on the menu and they get a very rich, thick drink! If that's not your cup of tea hot chocolate, many places also offer hot cocoa.

Ever since taking my first sip of hot chocolate, I've wanted to try making it. It was difficult to find a recipe because many people call hot cocoa by the incorrect name of hot chocolate (though, I admit it, I'm guilty of this too, at times). But at last, I found what I was looking for on wellplated.com…a drink worthy of a cold, snowy, Russian winter day.

And honestly? It's not that difficult to make.


You just need some chocolate. Pure chocolate.

But before chopping that magic up, get some cream and milk heating. It needs to be drinkable!


Then chop your chocolate...

...and add it to your warm cream and milk.

Whisk it up!

It will start to look something like this. Make sure it all melts before pouring it into mugs.


After all of the chocolate has melted and been stirred into the milk and cream, it will become a thick, dark, creamy, rich, chocolatey consistency, and you know it's ready.
Perfection in a cup.


Rich Hot Chocolate
Servings: 3-4*

Ingredients:
1 1/2 cups whole milk
1/2 cup heavy cream
2 tsp. powdered sugar
1/2 tsp. espresso powder (optional; will intensify chocolate flavor)
1-2 tsp. vanilla, mint, or peppermint extract to taste (optional, choose one)
8 oz. bittersweet chocolate, at least 72%, chopped*

Optional Garnishes:
Whipped cream
Marshmallows
Peppermint sticks
Cinnamon sticks
Scoop of ice cream

Directions:
1. Over medium heat in a medium pot, whisk whole milk, heavy cream, powdered sugar, espresso powder, and extract. Heat until there are bubbles around the edges; do not allow it to boil.
2. Remove pot from heat and whisk in chopped chocolate until melted. Return to low heat if the chocolate is not melted completely.
3. Serve warm. For leftover hot chocolate: cool to room temperature, store in an airtight container, and refrigerate. Carefully reheat in microwave or in a pot over low heat.

*Just quarter the recipe for a single serving.
*Better chocolate yields better hot chocolate, so use the highest quality possible. Do not use chocolate chips.

Recipe from: http://www.wellplated.com/french-hot-chocolate/

Sunday, March 29, 2015

Vanilla Almond Granola

When we lived in New Zealand about seven years ago, my parents were very (understandably) particular about my brother, sister, and I having a balanced breakfast. Each morning we would come into the dining room and my mom would have three bowls waiting on the counter, ready for us to eat.


It was the rule that we had to have yogurt, fruit, and either homemade granola or weet-bix. None of us kids really liked this breakfast all that much, and there are a few reasons why.

1. The yogurt was fine, but the fruit had some problems. New Zealand has a lot of great fruitwe had grapes, strawberries, and apples aplentybut there are a lot of weird fruits too. Take tamarillos, or tree tomatoes, for instance...what kind of kid wants tree tomatoes in their lovely yogurt breakfast?! Or what about persimmonsmy unrefined taste buds really did not appreciate those.

2. The grain. We were eating granola until something else came along...weet-bix, a.k.a. pieces of chopped up cardboard that are pressed back together into little bars and eaten for breakfast. Or at least that's what they look and taste likethey literally have no flavor! Of course what they lack in flavor they made up for in nutrition as they are packed full of vitamins, minerals, and a bunch of other stuff that 10-year old Maddie did not care about. Luckily, I could eat the yogurt and fruit separately from the weet-bix so that they were not contaminated. I still do not know why I chose weet-bix over granolawhat was I thinking?!


Seven years later, the rule of yogurt/fruit/grain is not in place, but choose it anyways. I love my morning yogurt and granola (with fruit if I can get it!), but I suspect that my appreciation for granola is largely because weet-bix was so lacking in every aspect that everything else seemed great. But really. A bowl of yogurt and granola is so tasty, yet I can eat it for breakfast every morning without feeling guilty at allespecially since I know exactly what's in my granola. No strange chemicals here! Plus, it's super simple to make and smells beyond amazing, like a bakery blew up in my house.


Vanilla Almond Granola

Notes:
*If you chop up whole almonds, do not put the dust from the chopping into the granola, or it will be more dry. The dust from chopping the almonds can be added to smoothies for more nutrition.

Recipe from: http://sallysbakingaddiction.com/2014/06/17/vanilla-almond-granola/

Tuesday, March 17, 2015

Decadent Chocolate-Mint Cookie Sandwiches

Happy St. Patrick's Day!

Okay, who am I kidding, I totally forgot that it was St. Patrick's Day today. The only green that I have on is my teeny-tiny hair rubber band. Hey—it counts!

However, I do have some delicious green cookies for you in celebration of the day. Previously I only thought of these as Christmas cookies because they're so decadent, but now I've realized that St. Patrick's Day is the PERFECT excuse to make them. So now, I get twice the fun out of these cookies because I can make them for either Christmas or St. Patrick's Day—observe:

Creme de menthe or mint + green food coloring = St. Patrick's Day
Peppermint + red food coloring + edges rolled in crushed candy cane = Christmas

You're probably wondering why I'm so crazy about these cookies; well, let me tell you, decadent isn't even a strong enough word to describe these little morsels of delight. It's cupcake-meets-ice cream sandwich-meets-cookie! The frosting of a cupcake, the coldness and sandwichyness of an ice cream sandwich, and the crumbliness and substantialness of a cookie (two, actually). These cookies combine fudgy chocolate and sugary frosting. It's delicious! It's addicting! I'm obsessed! Someone take them away before I eat them all!

You can tell I've eaten way too many cookies.


We've had this recipe for yeeeaaarrrs...once upon a time, a long, long time ago, someone (probably my mom) ripped this recipe out of Midwest Living—but it's often the oldest recipes that are the best: through the years, this recipe has persisted as a favorite of mine and my sister's, which is why I called in her help to make these the other week. I'm not going to lie, they take a lot of work! But I promise, they are so worth it.


Trust me, these will be enough to satisfy any craving for chocolate. Just promise me one thing, okay? Eat them cold (or, at least one). I know, it's really hard to resist stuffing them all into your face as soon as you finish assembling them (I speak from experience), but being cold intensifies the fudginess and brings out the mint flavor—they become similar to ice cream sandwiches.


Make these ASAP, and enjoy!

Decadent Chocolate-Mint Cookie Sandwiches

Ingredients:

Chocolate Cookies:

1 cup butter, softened
1 cup granulated sugar
1/2 cup packed brown sugar
2/3 cup cocoa powder (unsweetened or unsweetened Dutch processed)
1 1/2 tsp. baking powder
1/4 tsp. baking soda
3 eggs
2 tsp. vanilla
2 cups all-purpose flour

Chocolate Glaze:

1/3 cup whipping cream
6 oz. bittersweet or semisweet chocolate, finely chopped

Creme de Menthe Filling:

1/3 cup butter, softened
3 Tbs. green creme de menthe or creme de menthe syrup*
4 cups powdered sugar

Directions:

Chocolate Cookies:

1. Beat butter using an electric mixer on medium speed for 30 seconds in a large mixing bowl.
2. Add granulated sugar, brown sugar, cocoa powder, baking powder and baking soda and beat until combined, scraping sides of bowl as necessary.
3. Add eggs and vanilla and beat until combined.
4. Beat in as much flour as possible, then use a wooden spatula to stir in the rest of the flour by hand (this may not be necessary if you are using a stand mixer).
5. Cover dough and chill until easy to handle, 2 to 24 hours.
6. Preheat oven to 375ºF. Roll dough into 3/4 to 1 1/2 inch balls and place balls 2 to 3 inches apart on ungreased cookie sheets. Bake cookies for 6 to 10 minutes (depending on size of cookies—less time for smaller cookies). Remove from oven when edges are set; the middles may be slightly underdone, but will set while cooling. Cool on cookie sheet for 1 minute before transferring to a wire rack to finish cooling.
7. While cooling, make the Chocolate Glaze and the Creme de Menthe Filling.

Creme de Menthe Filling:

1. Combine butter and creme de menthe with an electric mixer in a large mixing bowl.
2. Gradually add powdered sugar, beating on medium speed until smooth.
3. If filling is not spreading consistency, add more creme de menthe, a little bit at a time. If filling is too loose, add more powdered sugar, a little at a time.

Chocolate Glaze:

1. In a small pot, stir whipping cream and chocolate over low heat until chocolate melts.
2. Remove from heat and let cool for about 20 minutes or until it thickens slightly.

Assembly:

1. For half of the cookies, frost the tops of them with the Chocolate Glaze. Do this spreading the Glaze on with an offset spatula or by dipping the tops of the cookies into the Glaze (you may have to reheat the Glaze a little to do this). Set cookies aside on wire rack, top sides up, until tops are set, about 30 minutes.
2. For the remaining cookies, use an offset spatula or a pastry bag to generously spread the bottoms of the cookies with the Creme de Menthe Filling.
3. For each cookie with filling, gently press a glazed cookie on top so that the filling is between the two cookies and the glaze is on the very top of the sandwich.
4. Place cookies in an airtight container in the refrigerator for at least 2 hours. Serve cookies cold. Store leftover cookies in the refrigerator for up to 4 days or in the freezer for up to 1 month.

*Notes:
For the frosting, you can replace creme de menthe with: 3 Tbs. milk + 1 1/2 tsp. vanilla + 1/2 tsp. mint or peppermint extract + 2-3 drops green or pink food coloring.
To make: Combine butter, peppermint or mint extract, food coloring and milk. Gradually add powdered sugar, beating until smooth. Add more milk to get to spreading consistency, and taste a little of the filling to make sure the mint/peppermint flavor is strong enough.

Recipe from: http://www.midwestliving.com/recipe/cookies/ultimate-chocolate-mint-cookie-sandwiches/

Sunday, March 1, 2015

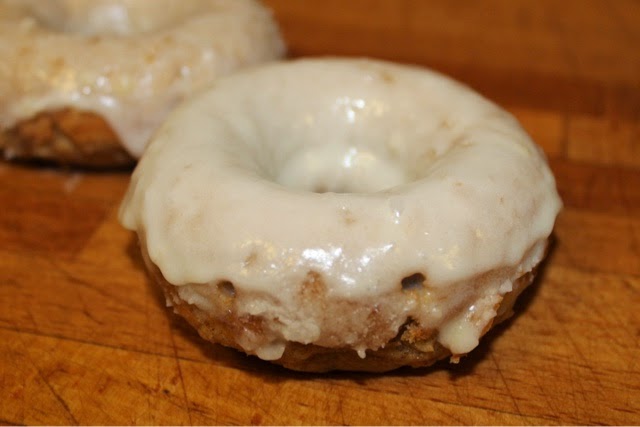
Brown Butter Glazed Apple Cinnamon Baked Donuts

I must say, these little beauties were so good that I made them twice in the same week.


Not surprising, considering the recipe is from Joy the Baker—she has the best baked donut recipes (just take her Brown Butter Baked Doughnuts for instance—yum!).


The flavors of these donuts are enticingly reminiscent of fall:

Shredded apple is the biggest autumn indicatorit takes me back to picking apples in the orchards of Michigan, then eating warm donuts alongside some fresh apple cider. *sigh*
Cinnamon, nutmeg, and ginger complement the apples perfectly, and make the donuts smell twice as good when baking.
Brown butter glaze is nutty and aromatic, with a warm, comforting flavor. You can never go wrong slathering donuts in a glaze starring this!


These donuts are best served fresh—they're so wonderfully moist, thanks to the shredded apple and the buttermilk.


Apple Cinnamon Baked Donuts with Brown Butter Glaze
Makes: 8-9 donuts

Recipe from: http://joythebaker.com/2013/10/apple-cinnamon-baked-doughnuts-with-brown-butter-glaze/